October 29, 2024
Highlight Timeless Moments

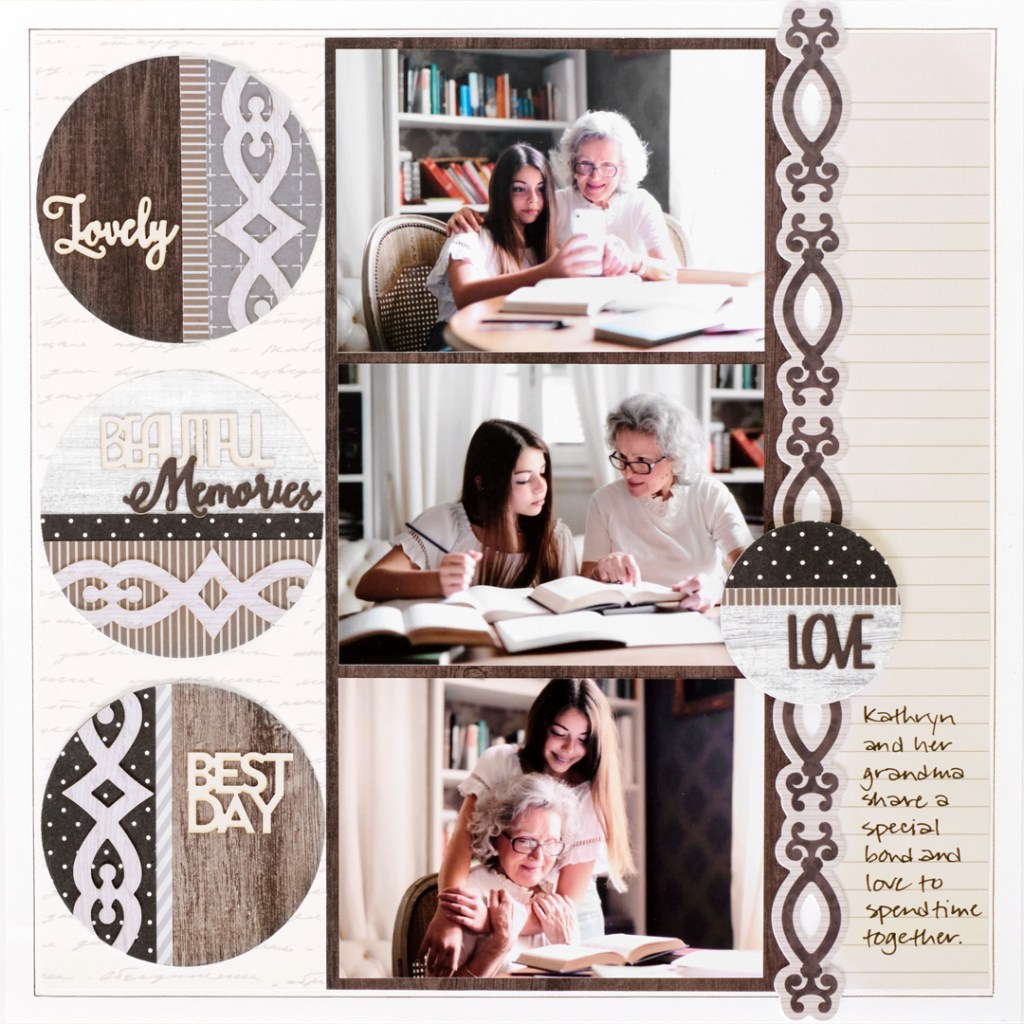
Preserve timeless memories with a layout meant to highlight those precious, everyday moments. By using laser cut borders and words from the Wonderful Day collection, you can add an extra touch of elegance and feeling to your layouts. Keep reading to see how you can recreate the one below.
To create this layout you will need:
- Wonderful Day Designer Paper Pack or (Shop Canada | Shop Australia)
- Wonderful Day Woodgrain Paper Pack or (Shop Canada | Shop Australia)
- Wonderful Day Laser Cut Borders or (Shop Canada | Shop Australia)
- Wonderful Day Laser Word Embellishments or (Shop Canada | Shop Australia)
- White Solid Cardstock or (Shop Canada | Shop Australia)
- Custom Cutting System with Circle Patterns or (Shop Canada | Shop Australia)
- 12-inch Trimmer or (Shop Canada | Shop Australia)
- Personal Trimmer or (Shop Canada | Shop Australia)
- Micro-Tip Scissors or (Shop Canada | Shop Australia)
- Tape Runner or (Shop Canada | Shop Australia)
- Repositionable Tape Runner or (Shop Canada | Shop Australia)
- Foam Squares Variety Pack or (Shop Canada | Shop Australia)
- Precision Point Adhesive Pen or (Shop Canada | Shop Australia)
- Black Dual-Tip Pen or (Shop Canada | Shop Australia)
- Black Micro-Tip Pen or (Shop Canada | Shop Australia)
- Ruler

Step 1: Use a sheet of white cardstock as the base for this layout. Cut a 3-3/8” x 11-1/4” strip with script paper and adhere on the left side of the layout, 3/8” from the left edge. Cut a 2” x 11-1/4” strip with ledger paper and adhere on the right side of the layout, 3/8” from the right edge. Cut a 5-1/2” x 11-1/4” piece with dark brown woodgrain paper and adhere on the center of the layout, butted up to the script strip. Adhere a scroll laser cut border between the dark brown woodgrain piece and the ledger piece, as shown.
Step 2: Crop three photos to 5” x 3-1/2” and adhere on the dark brown piece.
Step 3: Using the inside of the large circle pattern and the red blade, cut three circles with various woodgrain papers. Cut the same size circles with various designer papers. Trim off sections of the designer circles, layer and adhere on the woodgrain bases, as shown. Adhere a scroll laser cut border on one circle and trim off the excess. Repeat with the remaining circles and excess border. Using precision point adhesive, adhere laser cut word embellishments to the circles. Adhere on the left side of the layout.
Step 4: Using the inside of the medium circle pattern and the green blade, cut a circle with woodgrain paper. Repeat the process from Step 3 to finish the circle. Adhere on the layout as shown.
Step 5: Journal as desired on the ledger strip.
Step 6: Using a ruler, draw lines around the layout with a micro-tip black pen.
Do you usually use word embellishments in your scrapbooks?
P.S. Are YOU a member of the Virtual Crop Facebook Group? It’s your go-to place for MONTHLY Virtual Crops, MONTHLY Completed Album Challenges, QUARTERLY Secret Box Openings with project tutorials and so much more! We hope you’ll join our community of more than 40,000 fellow memory-keeping enthusiasts — you’ll feel right at home!

Absolutely gorgeous layout. I feel sorry for the people who are crazy for people being completely straight doing this page, but I am pretty laid back. I love it!