January 17, 2025
Have Your Birthday Cake Layout and Eat It Too!
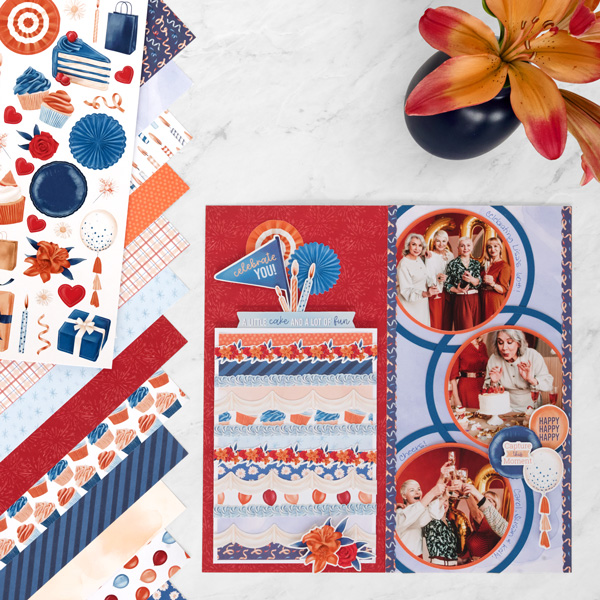
Celebrate the sweest of birthdays with this layout inspired by birthday cake! Use materials from the Birthday Jubilee collection to make your own tiered cake complete with frosting and floral inspired designs. You won’t want to blow out the candles on this birthday layout!
To create this layout you will need:
- Birthday Jubilee Designer Paper Pack or (Shop Canada | Shop Australia)
- Birthday Jubilee Stickers or (Shop Canada | Shop Australia)
- Bright White, Pumpkin and Blue Solid Cardstock or (Shop Canada | Shop Australia)
- 12-inch Trimmer with Straight and Scallop Blade or (Shop Canada | Shop Australia)
- Custom Cutting System with Circle Patterns or (Shop Canada | Shop Australia)
- Tape Runner or (Shop Canada | Shop Australia)
- Repositionable Tape Runner or (Shop Canada | Shop Australia)
- Foam Squares Variety Pack or (Shop Canada | Shop Australia)
- Foam Tape or (Shop Canada | Shop Australia)
- All-Purpose Scissors or (Shop Canada | Shop Australia)
- Navy Dual-Tip Pen (Shop Canada | Shop Australia)

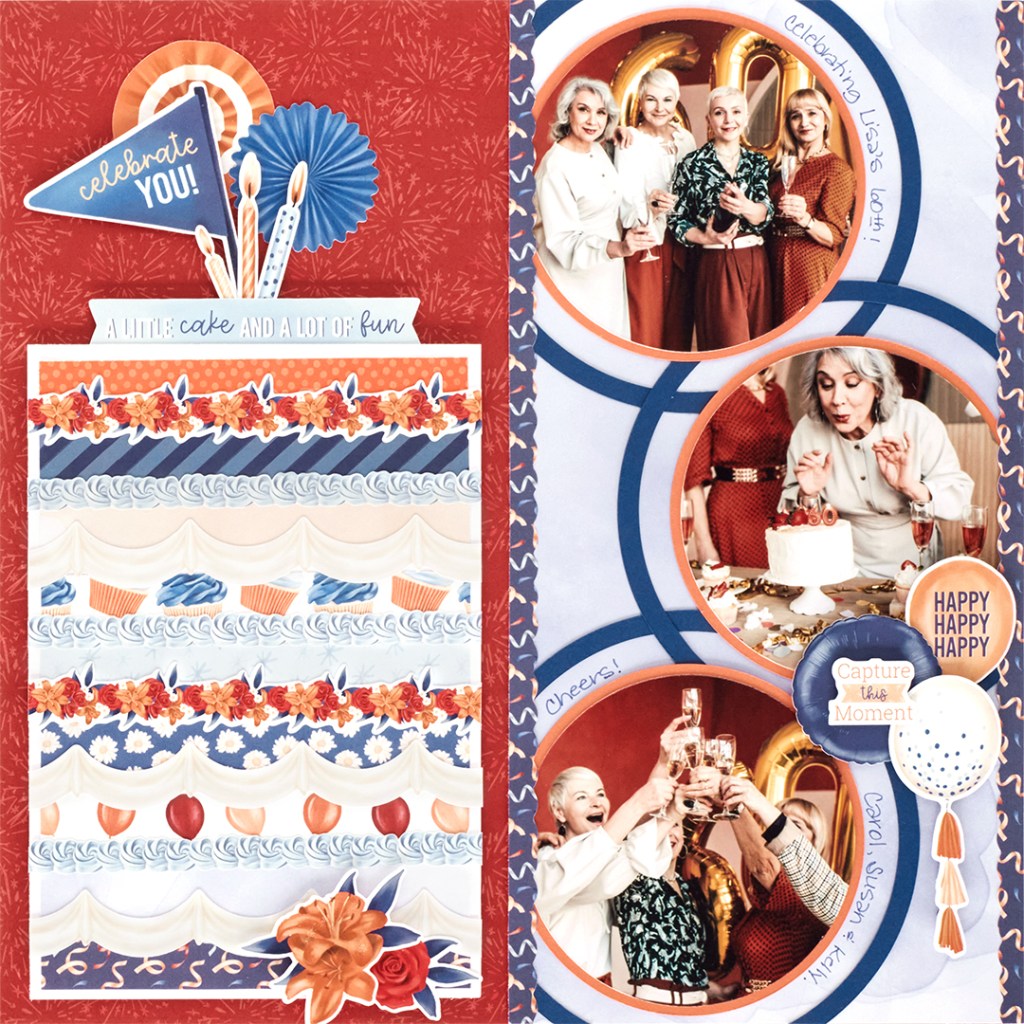
Step 1: Use a piece of sparklers paper as the base of the layout.
Step 2: Cut a piece of Bright White Solid Cardstock to measure 5-1/4” x 7-1/2”.
Step 3: Cut nine pieces of paper from a variety of patterns to measure 5” x ½”. Adhere to the piece of Bright White Solid Cardstock, leaving approximately 1/8” in between each piece.
Step 4: Adhere the border stickers in between each “layer of cake,” trimming off on the sides with scissors.
Step 5: Adhere the “cake” to the left side of the layout using Foam Tape.
Step 6: Cut a piece of blue watercolor paper to measure 6” x 12”. Adhere to the right side of the layout.
Step 7: Using the Custom Cutting System with the small CCS pattern on the outside with the Green Blade, cut three circles from Pumpkin Solid Cardstock. Adhere the circles to the right side of the layout, so that they are touching the outer edge of the blue watercolor paper.
Step 8: Cut three photos using the small CCS circle on the outside with the Red Blade. Adhere to the Pumpkin Solid Cardstock circles.
Step 9: Using the CCS medium circle and the Blue Solid Cardstock, cut three rings on the outside using the Blue Blade. Do not move the blade, then cut with the Red Blade on the outside. Adhere the rings around the Pumpkin Solid Cardstock circles/photos. Trim any excess with scissors.
Step 10: Adhere stickers using Foam Squares on some for added dimension.
Step 11: Journal as desired.
Did you add any special designs to your cake?
P.S. Are YOU a member of the Virtual Crop Facebook Group? It’s your go-to place for MONTHLY Virtual Crops, MONTHLY Completed Album Challenges, QUARTERLY Secret Box Openings with project tutorials and so much more! We hope you’ll join our community of more than 40,000 fellow memory-keeping enthusiasts — you’ll feel right at home!

Melissa, this layout is amazing! What a wonderful design. Love it!!!
Thank you!!!
LOVE the orange! My favorite color and the versatility for all genders.
Thank you! Orange is one of my favorites too!!