October 14, 2026
A Classic Christmas Layout with a Cut-and-Embossed Touch
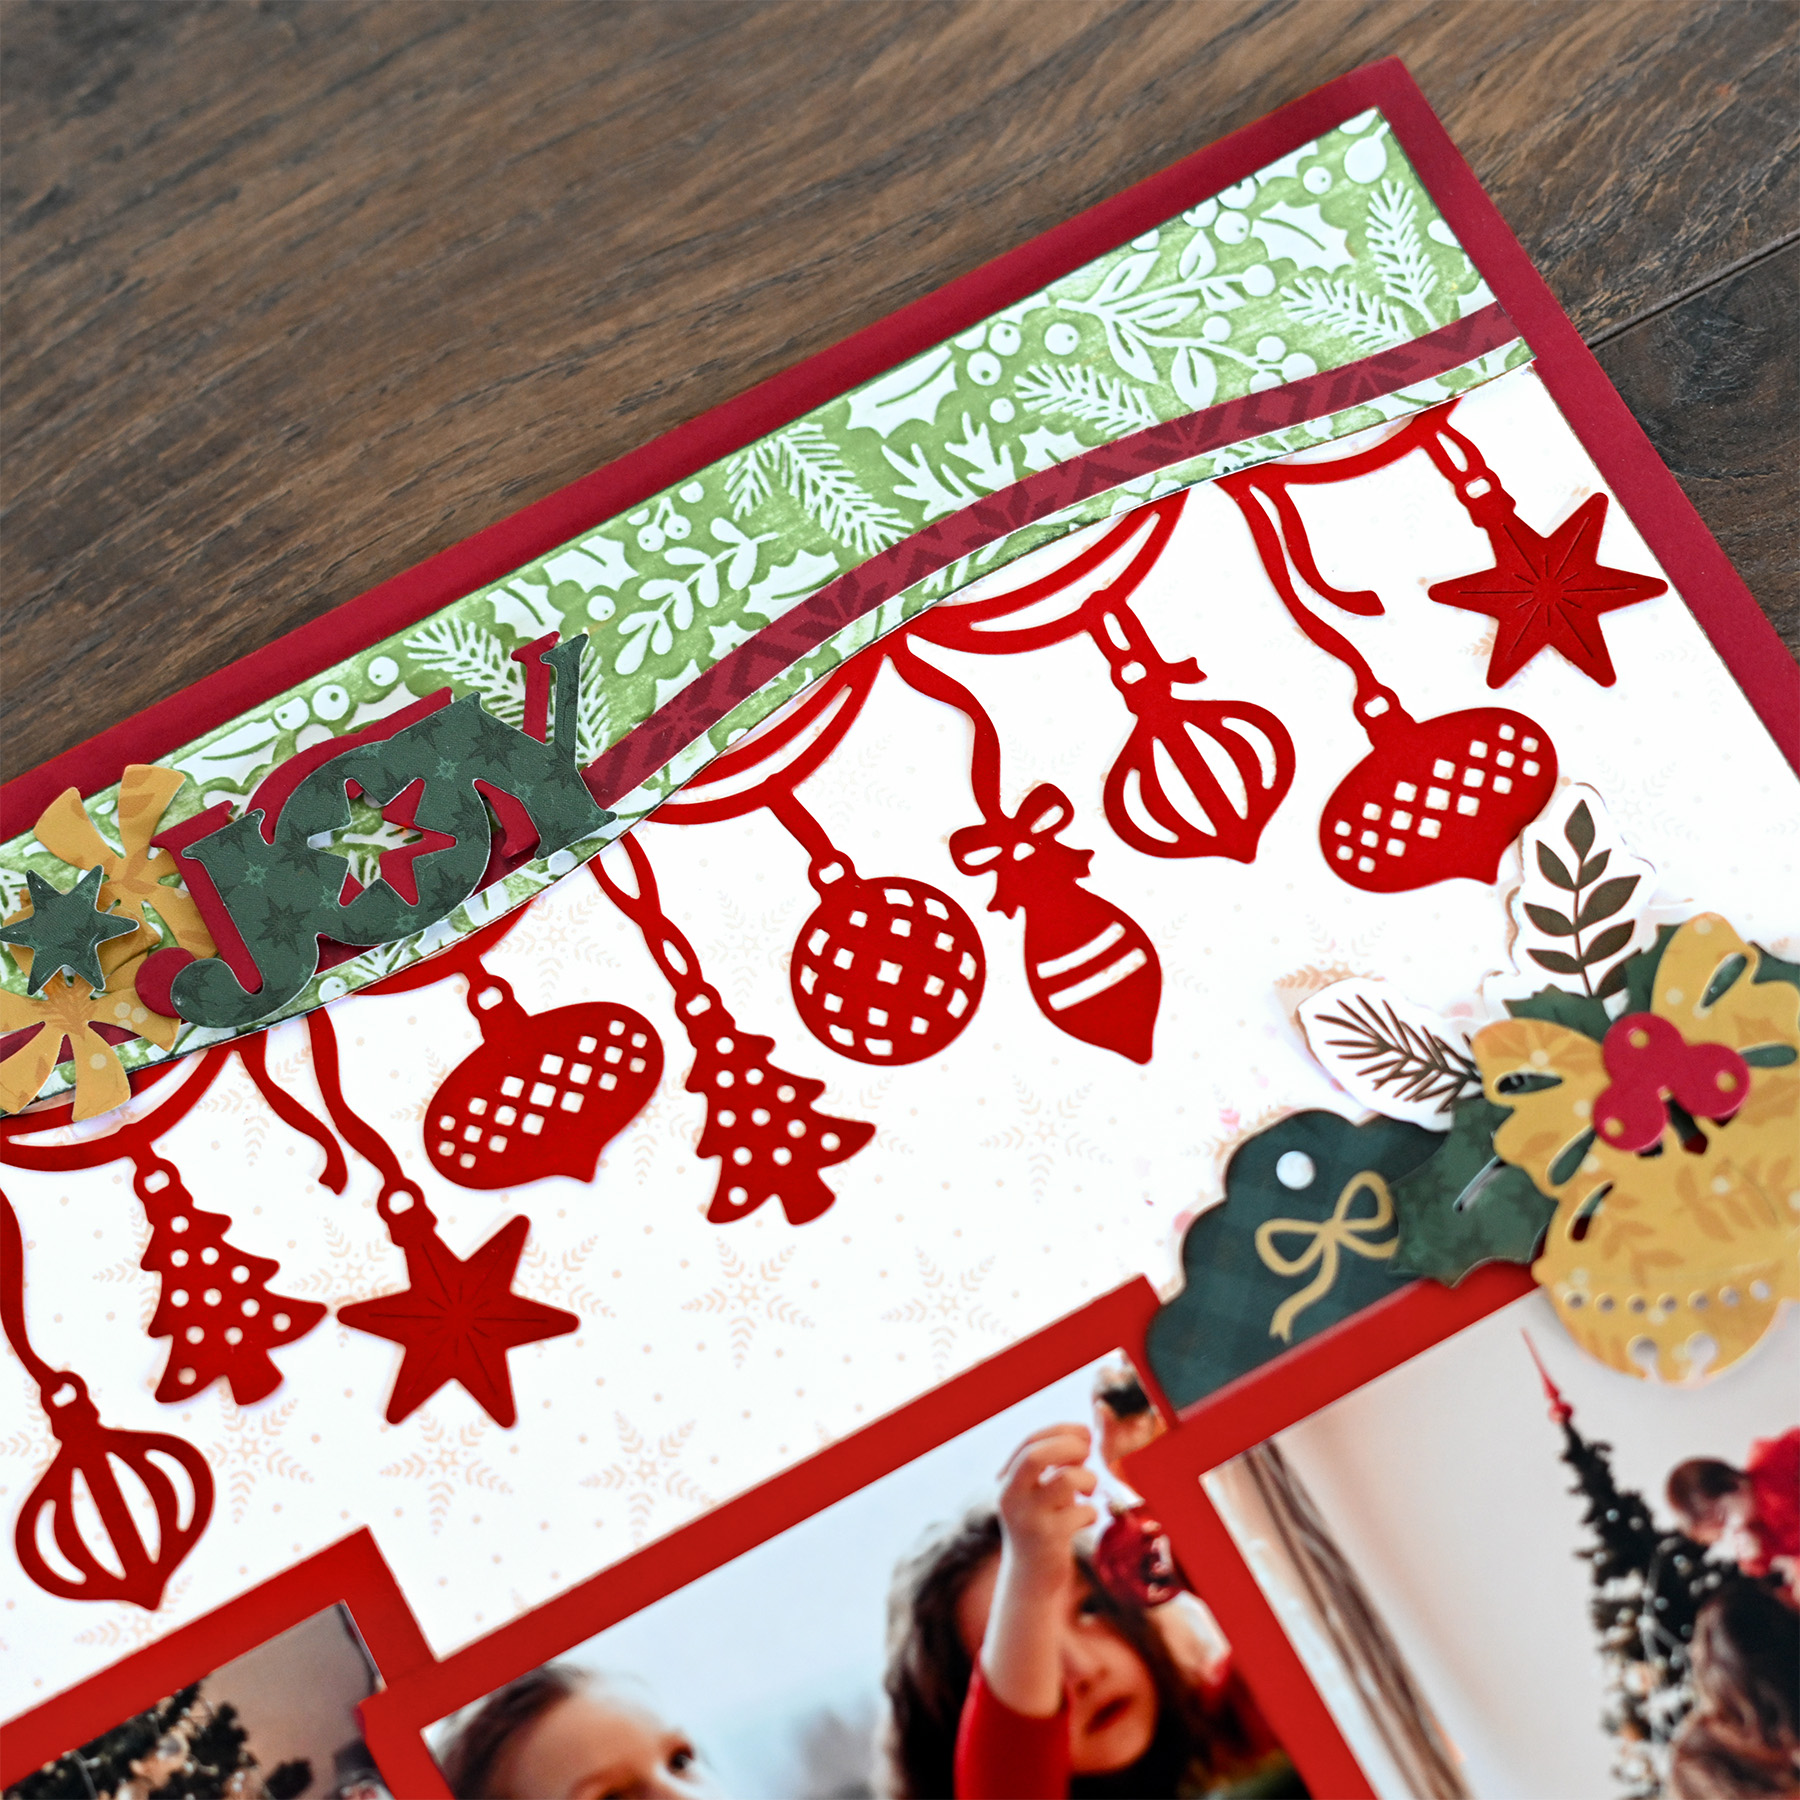
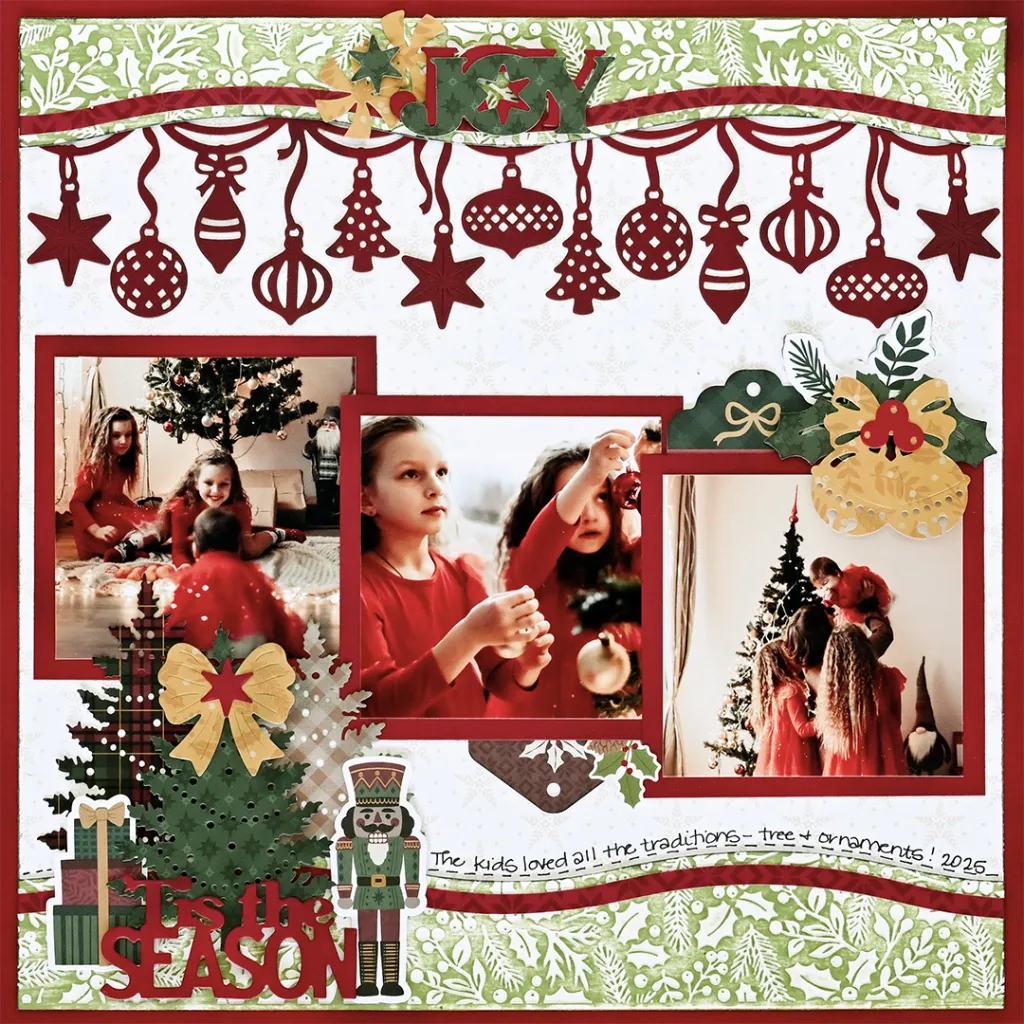
Layers of texture and classic Christmas details make this layout one to remember! The new Christmas Die-Cuts and Embossing Folder bring festive foliage, merry messages and favorite holiday icons to life with dimension and detail. Paired with the Ornament Garland Border, these little touches come together to create a timeless Christmas layout with Timeless Tidings that’s perfect for preserving your favorite holiday memories.
To create this layout, you will need:
- Timeless Tidings Paper Pack
- Timeless Tidings Embellishments
- Timeless Tidings Stickers
- Cranberry Solid Cardstock
- Stardust Solid Cardstock
- CCS Border Cutting Tools – Waves, Swells, Crests & Arch
- Red CCS Blade Cartridge
- 13×13 Cutting Mat
- Die-Cutting & Embossing Machine
- Die-Cutting Icons – Holiday Icons
- Die-Cutting Titles – Merry Messages
- Die-Cutting Border – Ornament Garland
- Embossing Folder – Festive Foliage
- Ink Pad – Kelly Green
- Craft Blending Brush – Kelly Green
- 12-inch Trimmer
- Photo Trimmer
- Repositionable Tape Runner
- Foam Squares
- Black Micro-Tip Pen

Love this layout?

Love this layout?

Step 1: Use a piece of Cranberry Solid Cardstock for the base of the layout.
Step 2: Cut a piece of white designer paper to measure 11-1/2″ x 11-1/2″. Ink the edges of the piece using the Kelly Green Ink Pad. Adhere it to the layout as shown.
Step 3: Cut a piece of Stardust Solid Cardstock to measure 12″ x 3″. Place it in the Festive Foliage Embossing Folder and run it through the Die-Cutting & Embossing Machine. Run the Kelly Green Ink Pad along the top of the debossed side.
Step 4: Using the Swells side of the CCS Border Cutting Tool, cut the embossed piece in half lengthwise. Ink edges with the Kelly Green Ink Pad. Adhere the strips to the top and bottom edges of the white designer paper.
Step 5: Using the Swells side of the CCS Border Cutting Tool, cut two pieces that measure 12″ x 1/4″ from red designer paper. Trim 1/4″ from each end, then adhere along the top and bottom edges of the previous cardstock pieces as shown.
Step 6: Cut a piece of Cranberry Solid Cardstock to measure 12″ x 3″. Place the strip in the Die-Cutting & Embossing Machine with the Ornament Garland Border Die-Cut. Gently rub the tops of the border with Kelly Green Ink and the coordinating Blending Brush. Adhere the border by tucking it under the edge of the swells on the top.
Step 7: Cut photo mats from Cranberry Solid Cardstock to measure 4″ x 4″. Adhere the mats to the layout overlapping the edges. Adhere photos that measure 3-1/2″ x 3-1/2″ to the mats.
Step 8: Use the Die-Cutting & Embossing Machine to cut out icons and titles. Adhere the die-cuts to the layout, using Foam Squares on some for added dimension.
Step 9: Adhere additional embellishments where desired. Journal as desired.

Want to recreate this layout?
We’ve gathered all the products featured in this project in one place, making it easy to find the papers, embellishments, tools and more.
P.S. Are YOU a member of the Virtual Crop Group? It’s your go-to place for MONTHLY Virtual Crops, MONTHLY Completed Album Challenges, QUARTERLY Secret Box Openings with project tutorials and so much more! We hope you’ll join our community of more than 53,000 fellow memory-keeping enthusiasts — you’ll feel right at home!

