July 16, 2016
Virtual Crop: Challenge 5

We are getting ready to wind down for the day!
I sure hope that we have been able to inspire you in some small way!
How many layouts/projects were you able to get done today?
Before we leave you, we are going to show you one last little technique!
CHALLENGE 5: Create a Favour Box! Follow Noreen’s instructions below! Make sure not to completely tie it up, so that you can add some treats or gift to the inside before you gift it! (Imagine the pure delight of the recipient, receiving a gift in such an adorable package!) Don’t forget to share a picture of your project on the Virtual Crop Facebook Event Page to qualify for the door prizes! Use hashtag #cmjulyvirtualcrop !!
Created by Noreen Smith-CAN:
Besides the awesome calendar grids, the paper in the A Year to Remember 2 Paper Pack has so many cute patterns that you can use for lots of different layouts and projects. I used one piece to make four cute favour boxes, and decorated them with tags made from the A Year to Remember Die-Cut Embellishments!
Instructions:
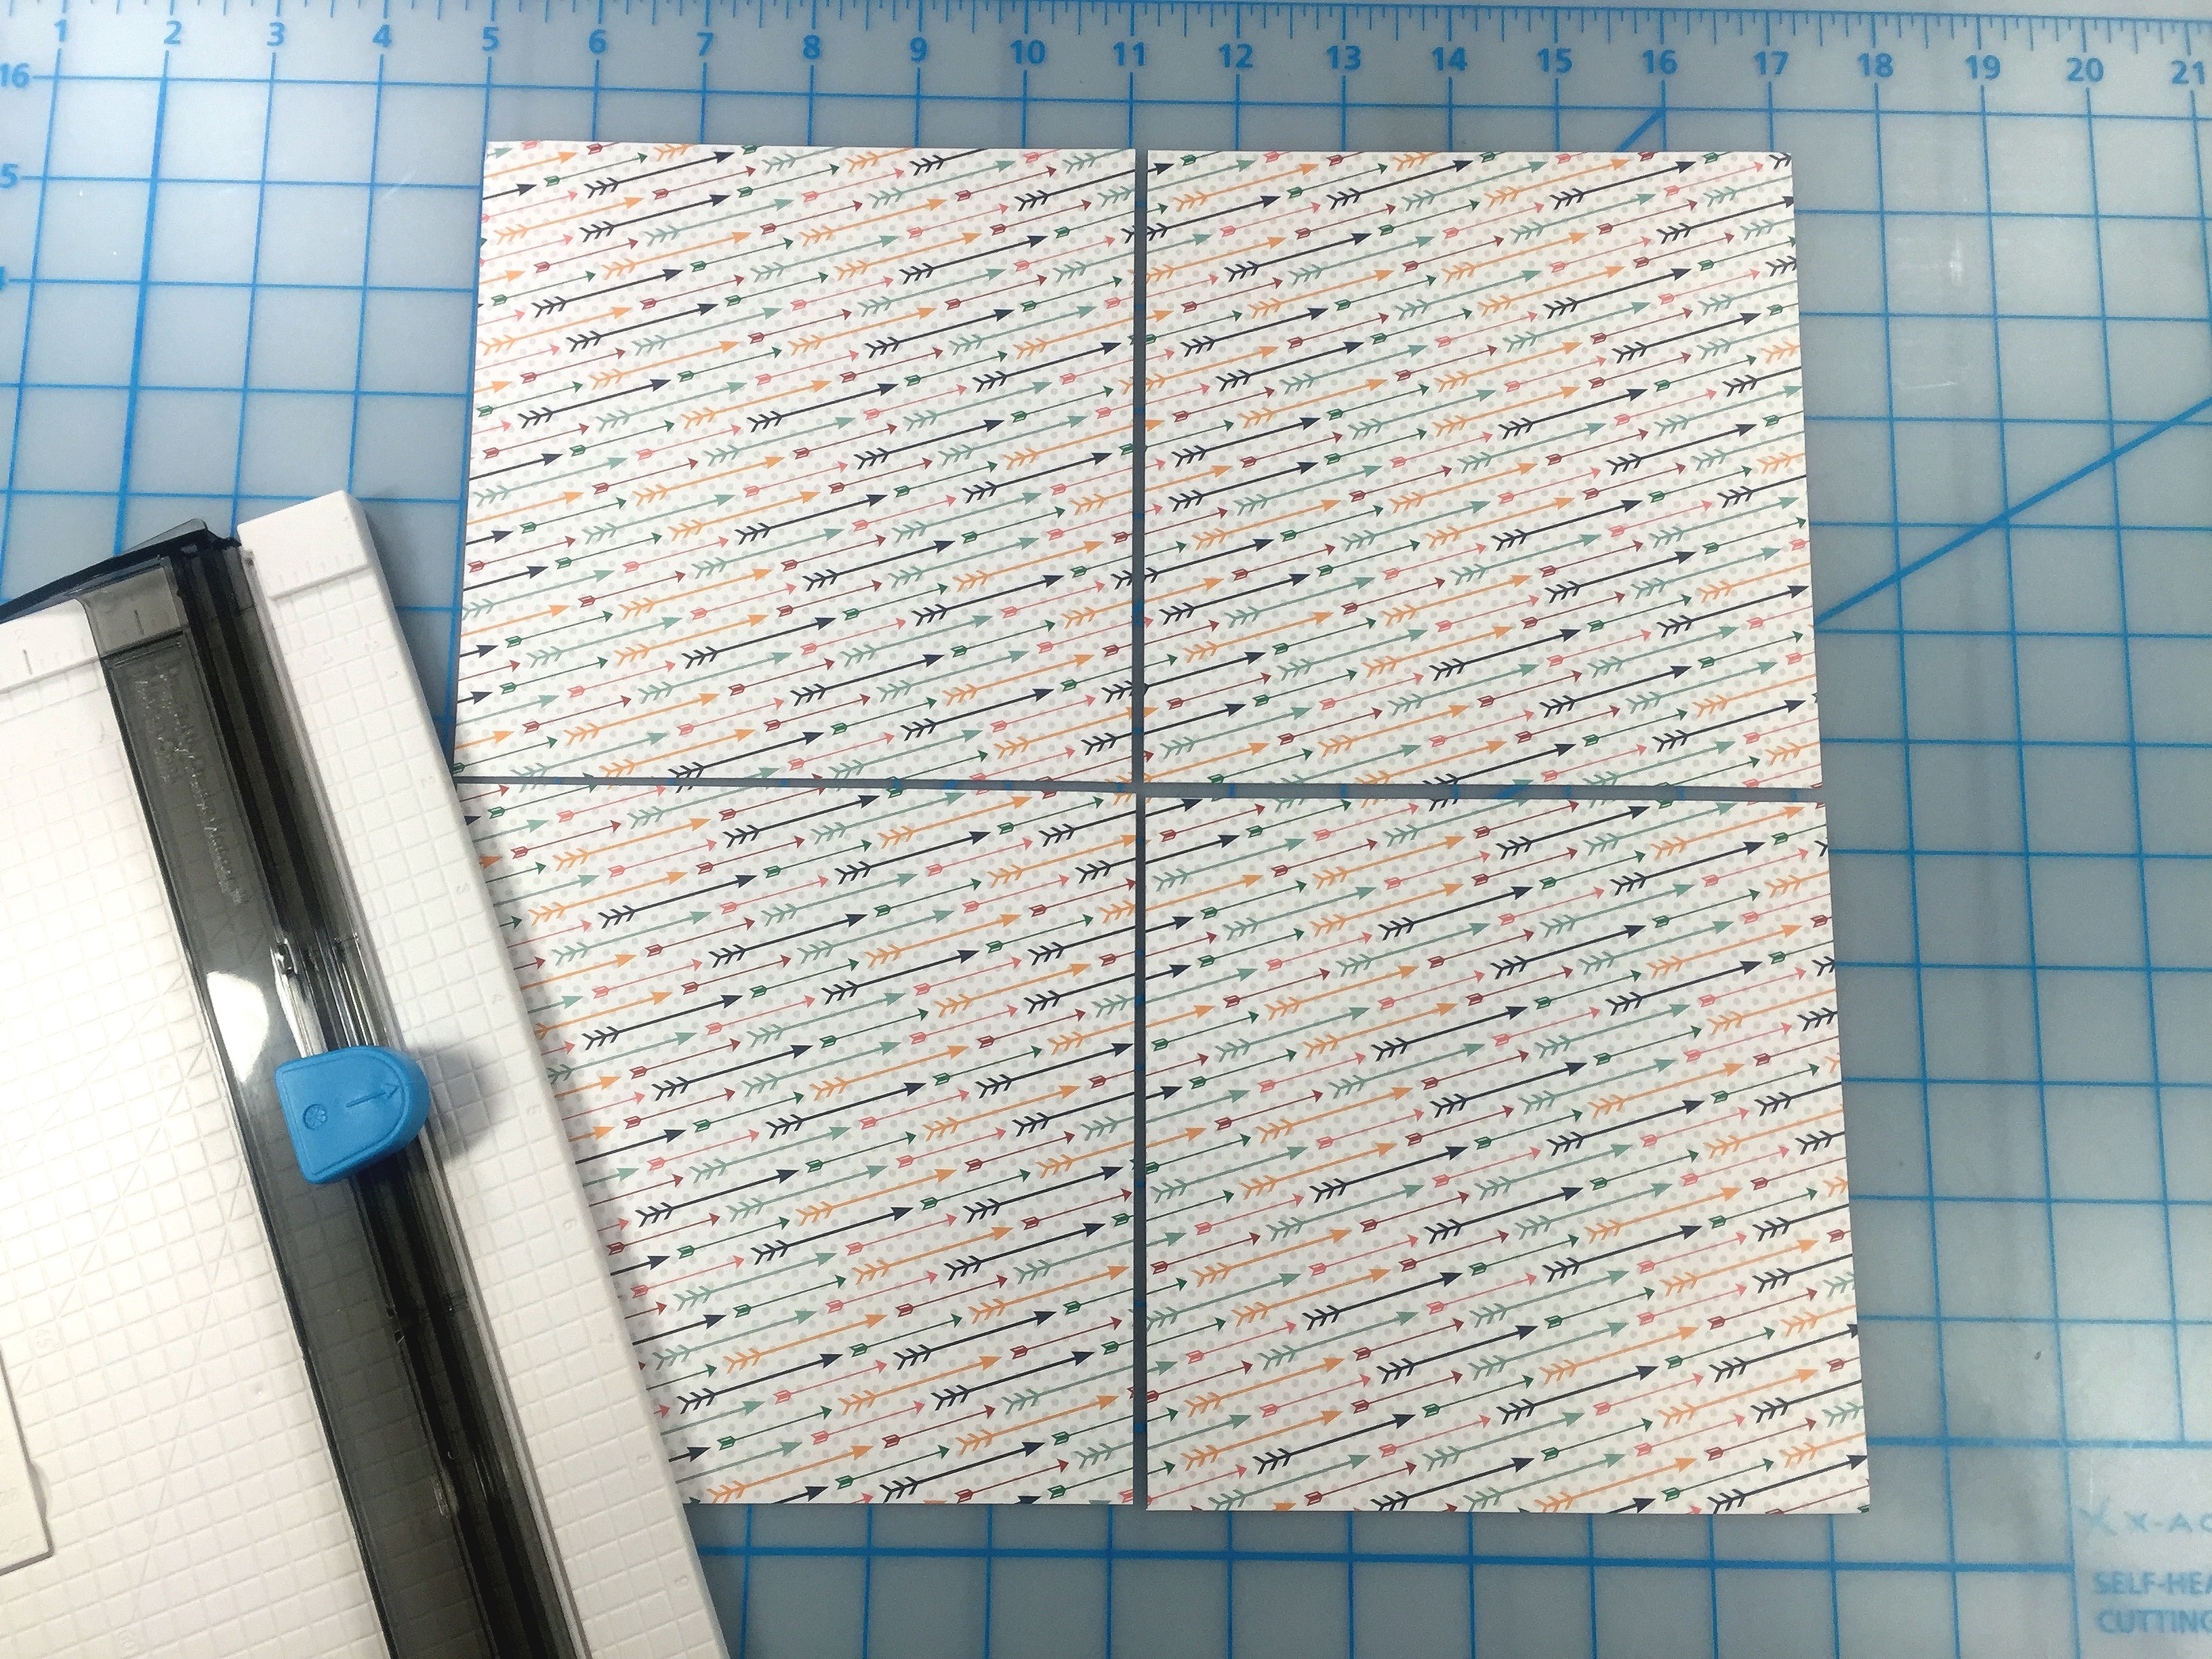
Cut your sheet of 12 x 12 paper into four, 6 x 6 pieces. Each piece will make one Pillow Box or Pinched Seam Favour!
To make the Pinched Seam Favour:
Place adhesive entirely along one edge of 6” square. Roll and join edges to form cylinder.

Add adhesive along inner edge of cylinder. Pinch closed. Repeat on other side, pinching to close in the opposite direction.


Punch hole in one seam, add twine or ribbon and tag.
To make Pillow Box:
Place adhesive entirely along one edge of 6” square. Roll and join edges to form cylinder as for the Pinched Seam Favour above. Gently flatten each open end without completely flattening the cylinder. Place the smallest circle template from the Custom Cutting System along the open end and use the Multi-Purpose Tool to trace and score around the circle template. Repeat on opposite end.


Prop the cylinder open, and gently push along the circular scored line to fold the edge into the center. Repeat on opposite side and adhere ends closed.


Wrap twine around the Pillow Box, add tag and tie into knot or bow.
To make Cardstock Tags:
Cut a piece of coordinating cardstock to 2” x 3.5”. Round two corners and punch a hole.
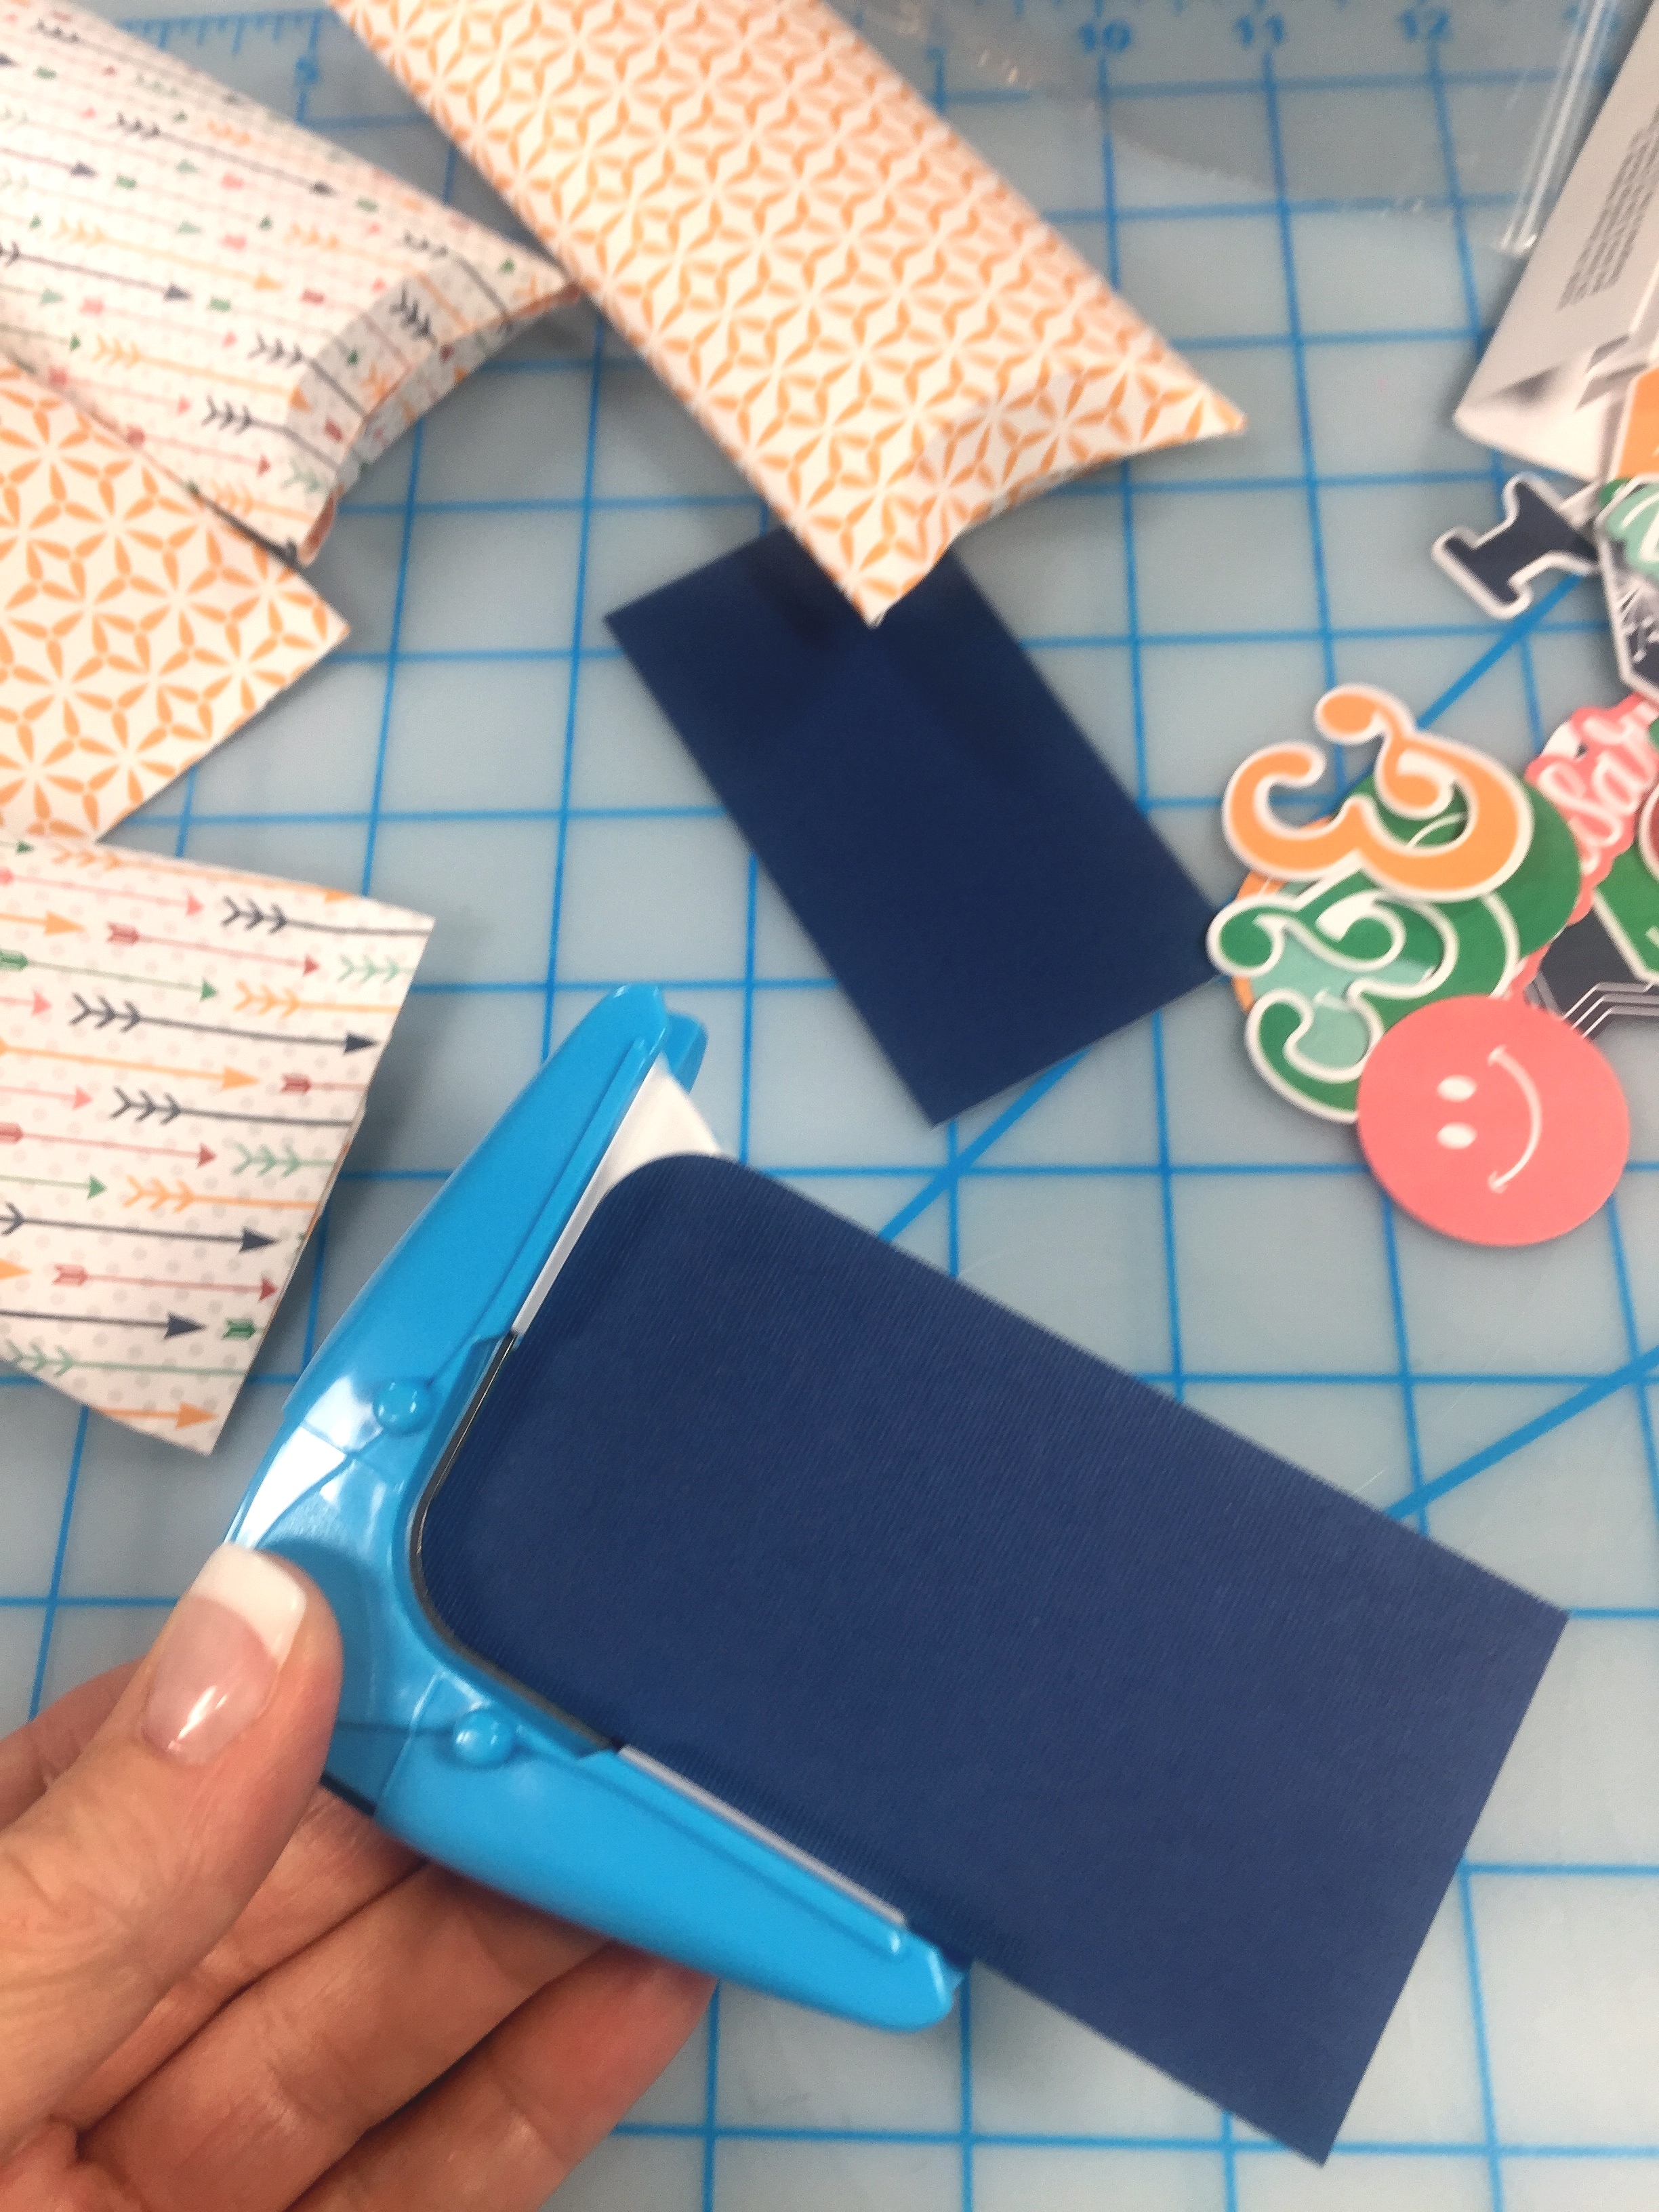
Add stickers or additional die-cuts to decorate. Punch hole in corner and add to package!
To make Die Cut Tags:
Choose two “thought bubble” die cuts and trim off the small triangle. Add stickers or additional die-cuts to decorate. Punch hole in corner and add to package!
Thank YOU so much for joining us! We look forward to meeting up with you again! Make sure you follow the Creative Memories Facebook Page, so that you are “in the know” about the next event!
Happy Creating!
Melissa
PS-Should you have a need to come back to these challenges, they will stay permanently on our blogs for reference!

Sent from my MetroPCS 4G LTE Android device
Awesome Design!
Woo Hoo! 10 pages done, and learned how to make favor boxes.
[…] July Virtual Crop: Challenge 5 […]
[…] each, cut a 6″ square piece of paper. Follow the instructions here to make […]