February 14, 2019
Imagine That! Easy-to-Make Adventure-Themed Scrapbook Borders!

Need a versatile and vibrant collection to brighten up every kind of page? The Imagine That! collection will be your go-to for celebrations, travel, everyday adventures, kids’ school and sports activities and more. The bold graphic elements and comic-book-superhero vibe are so fun to play with. Let’s make some borders!
To create these borders you’ll need:
- Imagine That! Paper Pack
- Imagine That! Variety Mat Pack
- Imagine That! Layered Embellishments
- Imagine That! Stickers
- Black and White Cardstock
- Banner Flag Punch
- Playland Mini Trio Punch
- Original Border Maker System with Star Banner Chain, Picket Fence and Midnight Star Cartridges
- 12-inch Trimmer
- Custom Cutting System with Circle Patterns
- Tape Runner with Repositionable Tape Runner Refill
- Foam Squares
Shop products by clicking your country’s icon below:


Dream BIG Border

- Cut a 2-1/2″ x 12″ strip of striped patterned paper for the base. Cut a 1-1/4″ x 12″ strip of circle patterned paper and adhere to the top of the base.
- Using the Midnight Star Border Maker Cartridge, punch a border with Black Cardstock. Trim to 1″ wide and apply to the border, 1/4″ down from the top edge.
- Using the Star Banner Chain Cartridge, punch a border with both Black Cardstock and blue patterned paper. Adhere the black border just underneath the midnight star piece and then the blue border just above and overlapping the black one as shown.
- Add the “dream BIG” and yellow tape stickers with Foam Squares, as well as the shooting star layered embellishment.
FUN Border

- Cut a 2-3/4″ x 12″ strip of blue plaid patterned paper for the base.
- Using the Picket Fence Border Maker Cartridge, punch a border with Black Cardstock. Trim to 1″ wide and adhere to the base, 1/4″ in from the right edge.
- Cut a 1-5/8″ x 12″ strip of confetti patterned paper and adhere to the base, overlapping the picket fence piece slightly. Adhere the circle border sticker to the right side of the border, overlapping the picket fence piece on the other side and creating a “bars” effect.
- Apply yellow, black and blue scribble bar stickers along the lower half of the confetti piece with the “FUN!” layered embellishment in the middle as shown. Add mini trio bursts cut from variety mats with Foam Squares.
Snap Border
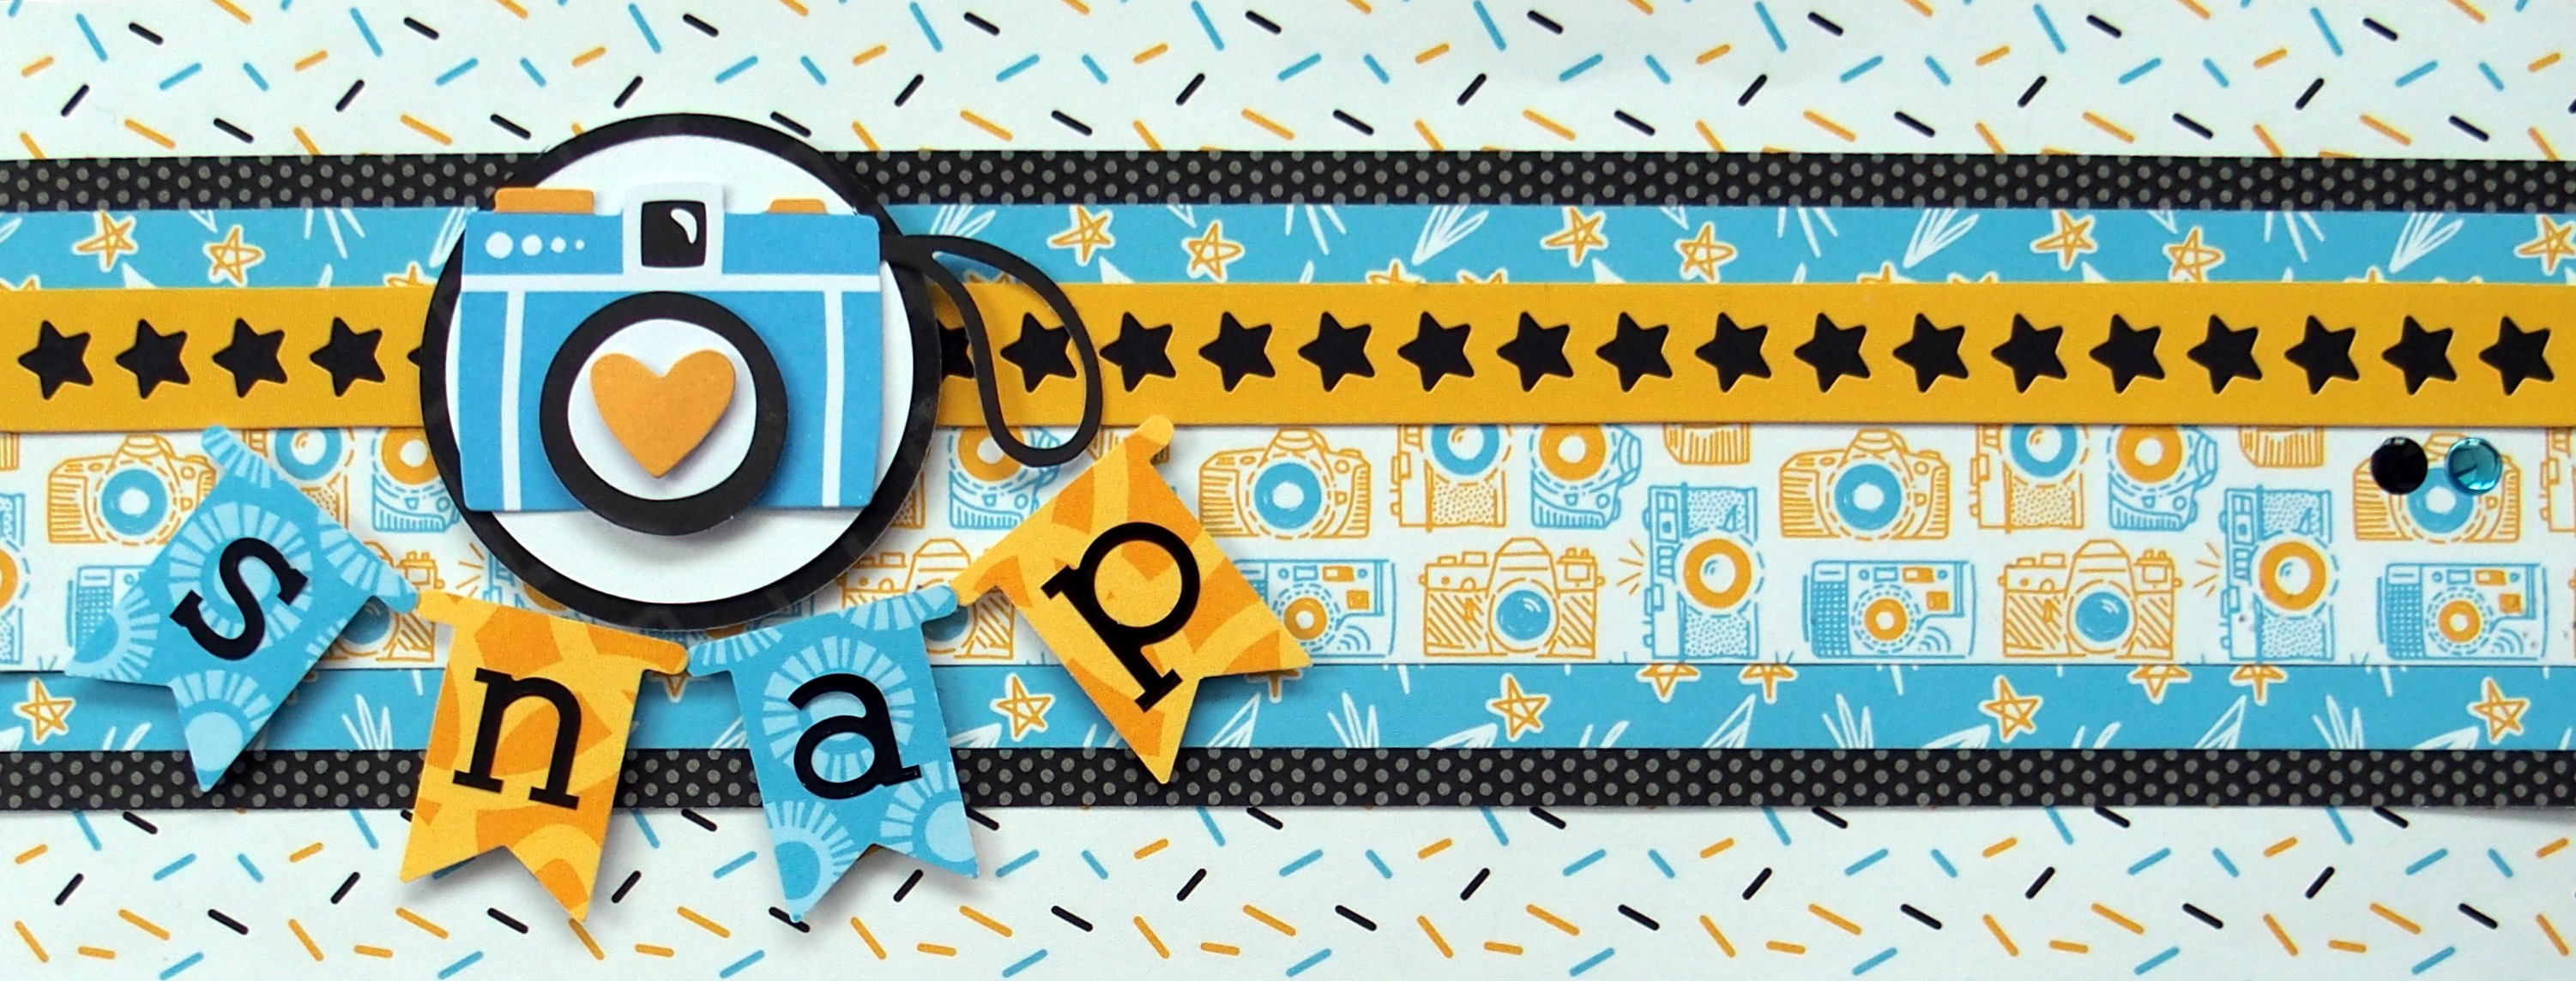
- Cut a 3″ x 12″ strip of black dot patterned paper for the base. Cut a 2-1/2″ x 12″ strip of shooting star patterned paper and add to the base, topped with a 1-3/4″ x 12″ strip of camera patterned paper.
- Back the stars border sticker with a 5/8″ x 12″ strip of Black Cardstock and add to the base, aligned with the top of the camera piece.
- Using the inside of the medium Custom Cutting System Circle Pattern and the Green Blade, cut a circle with White Cardstock. Using the Red Blade, cut a circle with a black variety mat. Mat the white on the black and adhere to the left side of the border using Foam Squares. Top with the camera layered embellishment.
- Punch four flags using yellow and blue variety mats and the Banner Flag Punch. Add to the border underneath the camera with Foam Squares, forming a semicircle. Add “snap” with ABC/123 stickers and embellish with enamel stickers.
An adventure scrapbook layout is not complete without a border that packs a punch. Thankfully, the Imagine That! collection is made with colors and designs that pop on the page, making it perfect for creating eye-catching borders. What types of ways have you been using the Imagine That! collection? Let us know in the comments below!


These are great! I love the Imagine That! collection and I can use these ideas for borders :-)
Your borders are always just darling! I can’t wait to scraplift them!
Most beautiful borders EVER!!!!
Those ideas are just what I needed to spark my creativity again. Thank you!!
Love these border ideas…so perfect for the Disney album…thank you so much!!
[…] Love the Imagine That! scrapbook border shown above? Get the instructions here! […]
[…] Love the Imagine That! scrapbook border shown above? Get the instructions here! […]
[…] Love the Imagine That! border shown above? Get the instructions here! […]