January 15, 2021
Take a New Angle With These Triangle Scrapbook Projects
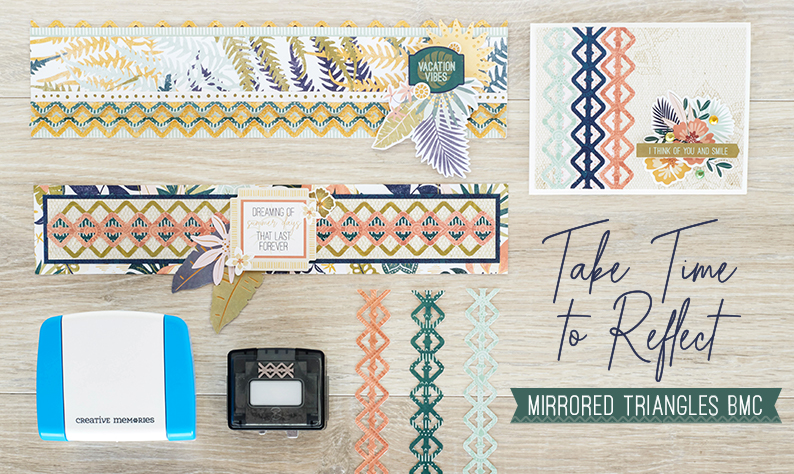
Are you in need of a new creative angle for your upcoming layouts and projects? Well, triangle this out for size — the Mirrored Triangles Border Maker Cartridge! Whether the cut-out border is kept in tact with its reflected symmetrical detail or sliced in half to showcase its pretty points (or whatever creative style and innovation suits your fancy!), this BMC is a geometric go-to winner. See for yourself with these triangle scrapbook layouts — three borders and a card!
To create these borders and card, you will need:
- Boho Escape Paper Pack or (Shop Canada | Shop Australia)
- Boho Escape Tone-on-Tone Paper Pack or (Shop Canada | Shop Australia)
- Boho Escape Foiled Embellishments or (Shop Canada | Shop Australia)
- Boho Escape Stickers or (Shop Canada | Shop Australia)
- Boho Escape Variety Mat Pack or (Shop Canada | Shop Australia)
- Black, Crimson, Rich Brown, Scarlet & White Solid Cardstocks or (Shop Canada | Shop Australia)
- Original Border Maker System with Mirrored Triangles Border Maker Cartridge or (Shop Canada | Shop Australia)
- 12-inch Trimmer with Straight, Deckle & Scoring Blades or (Shop Canada | Shop Australia)
- Micro-Tip Scissors or (Shop Canada | Shop Australia) — Returning March
- Tape Runner or (Shop Canada | Shop Australia)
- Repositionable Tape Runner or (Shop Canada | Shop Australia)
- Foam Squares or (Shop Canada | Shop Australia)
Check out the Mirrored Triangles Border Maker Cartridge in action in the video below!

Dreaming Border
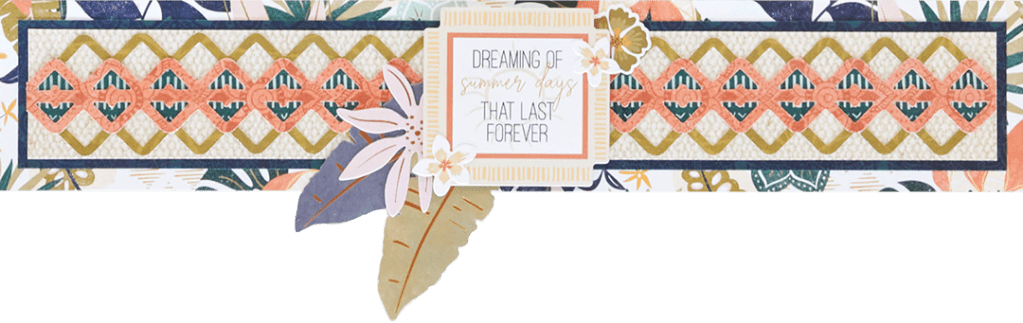
Step 1: Cut a 12″ x 2-1/4″ strip of tropical floral designer paper for the base. Cut an 11-1/2″ x 1-3/4″ strip of navy tonal paper and align and adhere it to the middle of the base. Cut an 11-1/4″ x 1-1/2″ strip of tan canvas designer paper and mount on top.
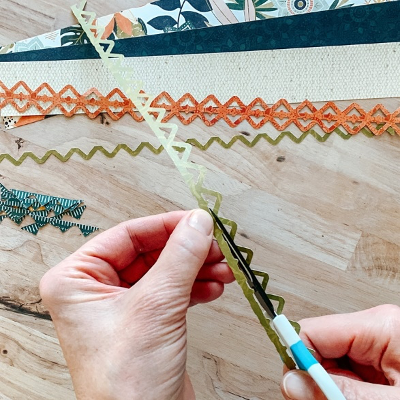

Step 2: Using the Mirrored Triangles Border Maker Cartridge, punch one border from each olive, dark teal stripe and terra cotta papers. Using just the punched out pieces of the dark teal border (save the actual border for one of the following borders), adhere them behind the terra cotta border so the dark teal shows through the triangle cutouts. Trim off the middle bar section of the olive border so just the two zigzag sections remain. Attach each to the top and bottom of the terra cotta border, trimming as necessary, and mount on the border.
Step 3: Add embellishments and stickers, popping some up with Foam Squares for added dimension.
Vacation Vibes Border

Step 1: Cut a 12″ x 2-3/4″ strip of mint stripe tonal paper for the base. Cut a 12″ x 1-1/2″ strip of ferns designer paper and adhere to the top section of the base.
Step 2: Punch three borders using the Mirrored Triangles Border Maker Cartridge from dark teal stripe and mustard tonal paper. Tuck one behind the base at the top so just the tips of the triangles show. With the other two, fold the top triangle section down over the lower section. Overlap and adhere each to the lower half of the base.
Step 3: Place a border sticker between the mirrored triangles borders and ferns strip. Add stickers and embellishments, popping some up with Foam Squares for added dimension.
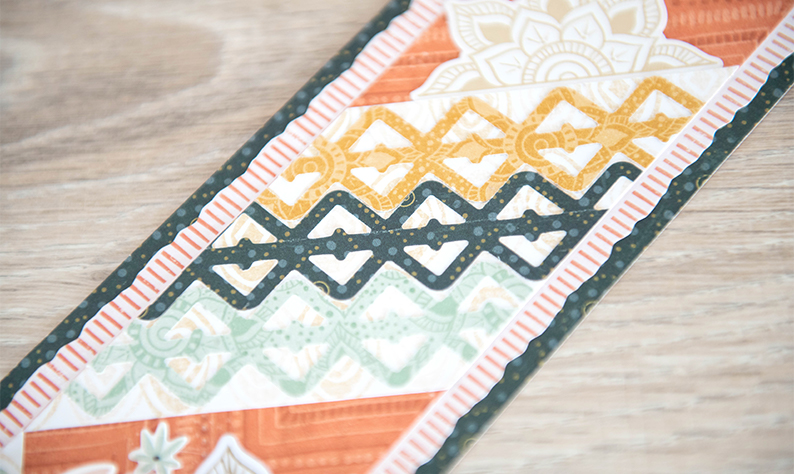
Floral Zigzag Border

Step 1: Cut a 12″ x 2-3/4″ strip of dark teal dotted designer paper for the base. Using the 12-inch Trimmer with the Deckle Blade, cut a 12″ x 2-1/2″ strip of salmon pink stripe tonal paper and adhere on the base. With the 12-inch Trimmer with the Straight Blade, cut a 12″ x 2″ strip of terra cotta chevron designer paper and mount on top.
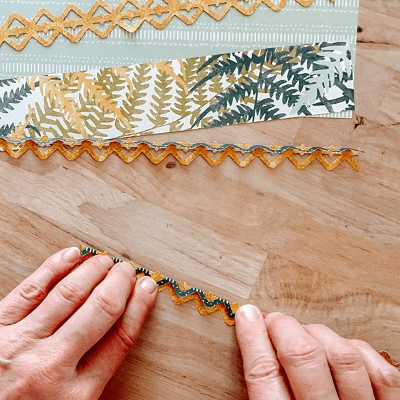
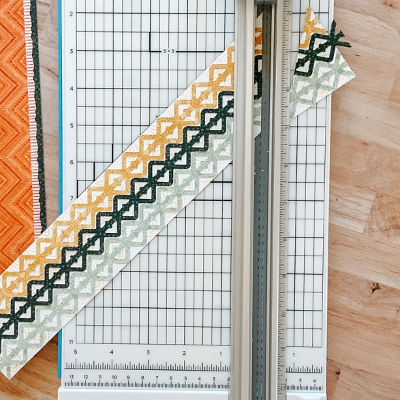
Step 2: Cut a 12″ x 2-1/4″ strip of white with mustard ovals tonal paper. Punch one border using the Mirrored Triangles Border Maker Cartridge with each mint, mustard and dark teal dotted papers. Adhere the three borders side by side and nestled together on the strip.
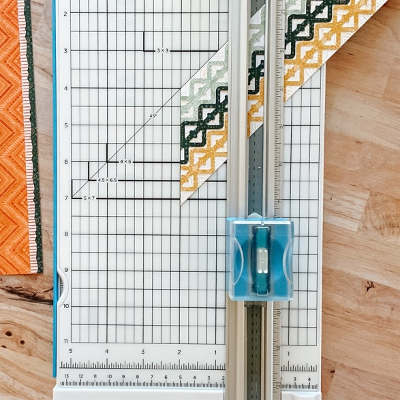
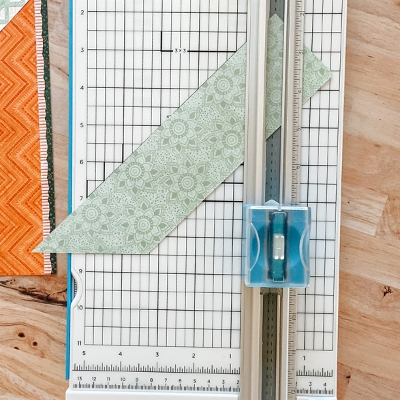
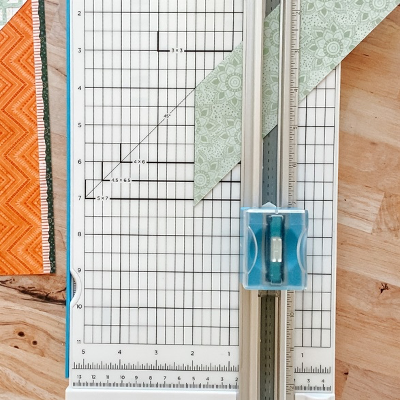
Step 3: Using the photos below as a guide, align the strip on the trimmer using the 45-degree line and cut off one corner. Rotate and align the straight edge at 2″ and cut at the same angle. Flip the strip to the back side and repeat.
Step 4: Add stickers and embellishments, cutting one floral embellishment in half before placing on the border as shown. Pop small stickers up with Foam Squares for added dimension.
I Think of You and Smile Card
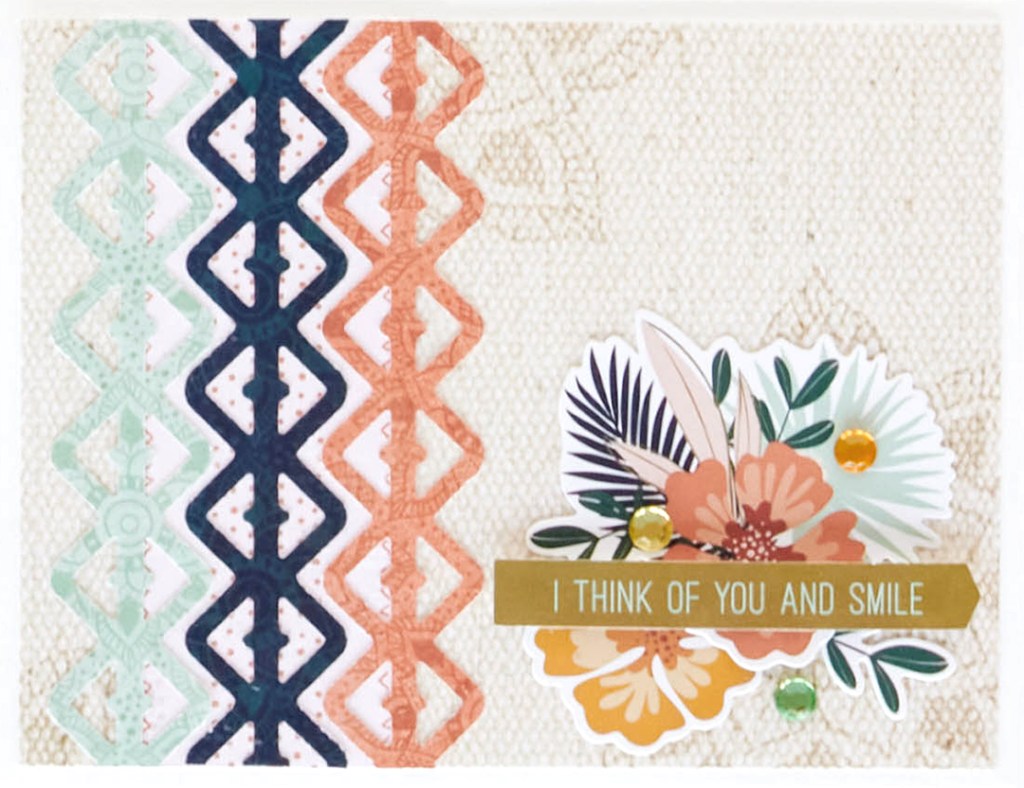
Step 1: Create the card base. Cut an 8-1/2″ x 5-1/2″ piece of White Solid Cardstock. Using the 12-inch Trimmer with the Scoring Blade, score along the long edge at 4-1/4″ and fold in half. Or use a card base from the Blank Card Kit.
Step 2: Cut a tan canvas mat to measure 5-1/4″ x 4″. Cut a 1-1/2″ x 4″ strip of salmon pink stripe tonal paper and adhere it to the tan canvas piece, about 1/2″ from the left edge.
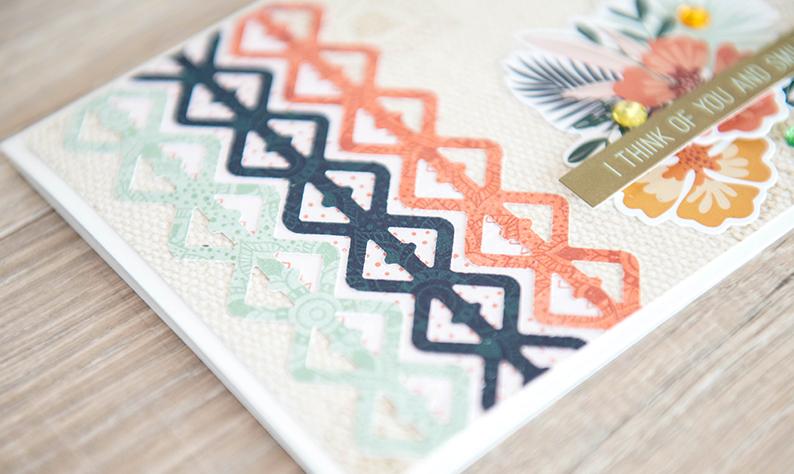
Step 3: Punch a border using the Mirrored Triangles Border Maker Cartridge from each mint, navy and terra cotta mandala tonal papers. Adhere side by side and nestled together along the salmon pink strip as shown. Trim edges as needed and adhere the tan canvas mat to the front of the card.
Step 4: Add embellishments and stickers.
Which of these triangle scrapbook projects do you like the most? Comment below and let us know which ones you’ll be trying out for yourself!

Love the card!
Great ideas! I never would have thought to fold like this. Thanks!
[…] to test out the Mirrored Triangles Border Maker Cartridge? Then this blog post is a great place to […]
[…] Bask in warm-weather wonders with this beauty of a border! Check it out for yourself in this blog post! […]
[…] Border 2 (Boho Escape) on the CM Blog […]