April 15, 2021
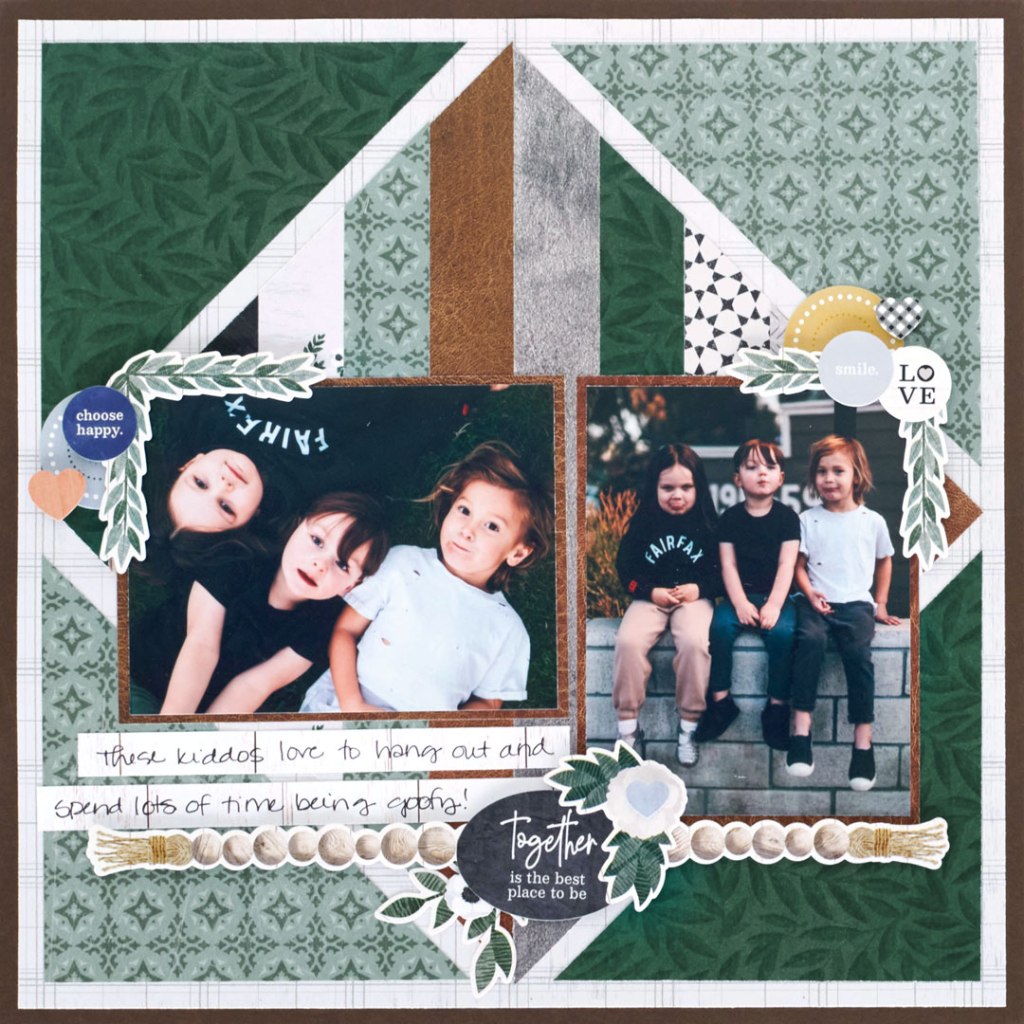
Boast a Beautiful Bond With This Family Scrapbook Layout

Family is everything. They’re the ones (whether by blood or not) who have your back and pick you up when you need support, the companions who love you no matter what, the folks who cheer you on as you celebrate successes in life and the people who laugh with you and strive to see you smile. And when you want to give a shout-out to those who are near and dear to your heart, this family scrapbook layout will surely wrap up these special sentiments with its comforting-meets-charming allure.
To create this layout you will need:
- Homestead Paper Pack or (Shop Canada | Shop Australia)
- Homestead Stickers or (Shop Canada | Shop Australia)
- Rich Brown Solid Cardstock or (Shop Canada | Shop Australia)
- 12-inch Trimmer or (Shop Canada | Shop Australia)
- Tape Runner or (Shop Canada | Shop Australia)
- Repositionable Tape Runner or (Shop Canada | Shop Australia)
- Foam Squares or (Shop Canada | Shop Australia)
- Brown Dual-Tip Pen or (Shop Canada | Shop Australia)
- CM Zero Centering Ruler or (Shop Canada | Shop Australia)
- Pencil

Step 1: Use Rich Brown Solid Cardstock for the base of the layout.
Step 2: Cut a piece of plaid paper to measure 11-1/2″ x 11-1/2″. Adhere to the cardstock base.
Step 3: At the top of the plaid paper, use a ruler and make a pencil mark at 5-3/4″. Do the same on the bottom. Draw a light line from the pencil mark at the top of the plaid page to the pencil mark on the bottom of the plaid page.
Step 4: Cut two pieces of paper to measure 11″ x 1″. Cut the ends of each piece using the 45-degree line on the 12-inch Trimmer, with the top corner of the paper point along the cutting track. Adhere these pieces so they meet up in the middle of the plaid paper, using the pencil line as a guide.
Step 5: Cut two pieces of paper to measure 9″ x 1″. Cut the ends of each piece like previous pieces. Adhere along the previous pieces.
Step 6: Cut two pieces of paper to measure 7″ x 1″. Cut the ends of each piece like the previous pieces. Adhere along the previous pieces.
Step 7: Cut two pieces of paper to measure 5″ x 1″. Cut the ends of each piece like the previous pieces. Adhere along the previous pieces.
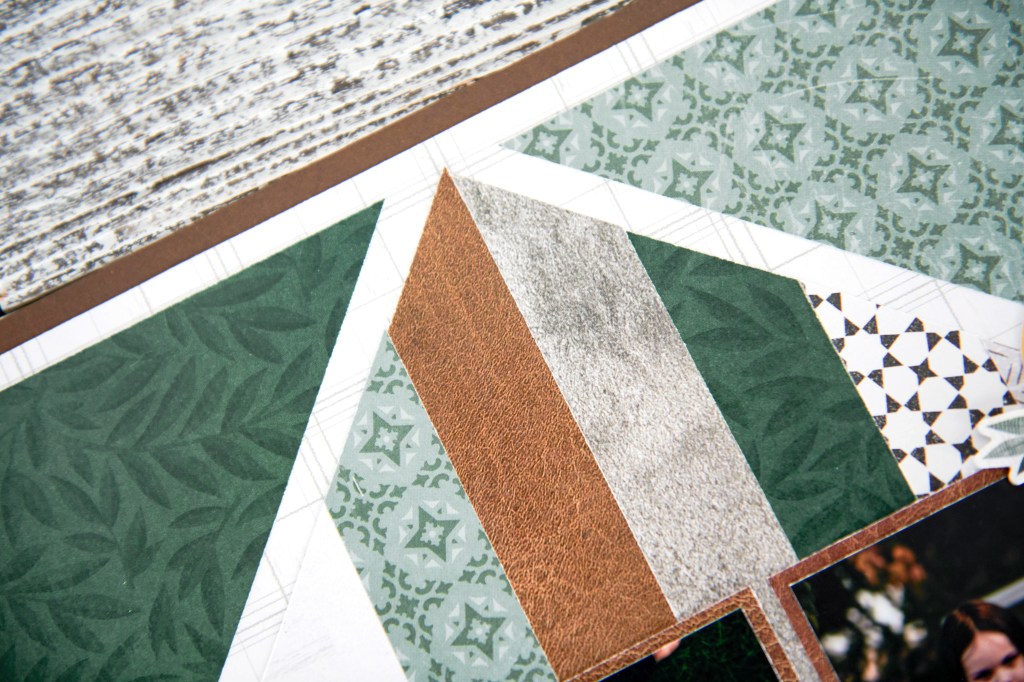
Step 8: Cut two pieces of paper to measure 3″ x 1″. Cut the ends of each piece like the previous pieces. Adhere along the previous pieces.
Step 9: Using two triangles that were cut from the ends of the paper strips, adhere to the edges of the previous strips to complete the square/diamond shape as shown.
Step 10: Cut two 5″ x 5″ squares from the dark green leaves paper. Cut from corner to corner, creating two triangles from each square. Adhere in the corners of the plaid paper.
Step 11: Cut two photo mats to measure 5-1/4″ x 4″. Adhere to the layout. Cut one photo to measure 3-3/4″ x 5″ and one photo to measure 5″ x 3-3/4″. Adhere to the mats.
Step 12: Cut two strips at varying lengths for journal boxes. Adhere to the layout and journal as desired.
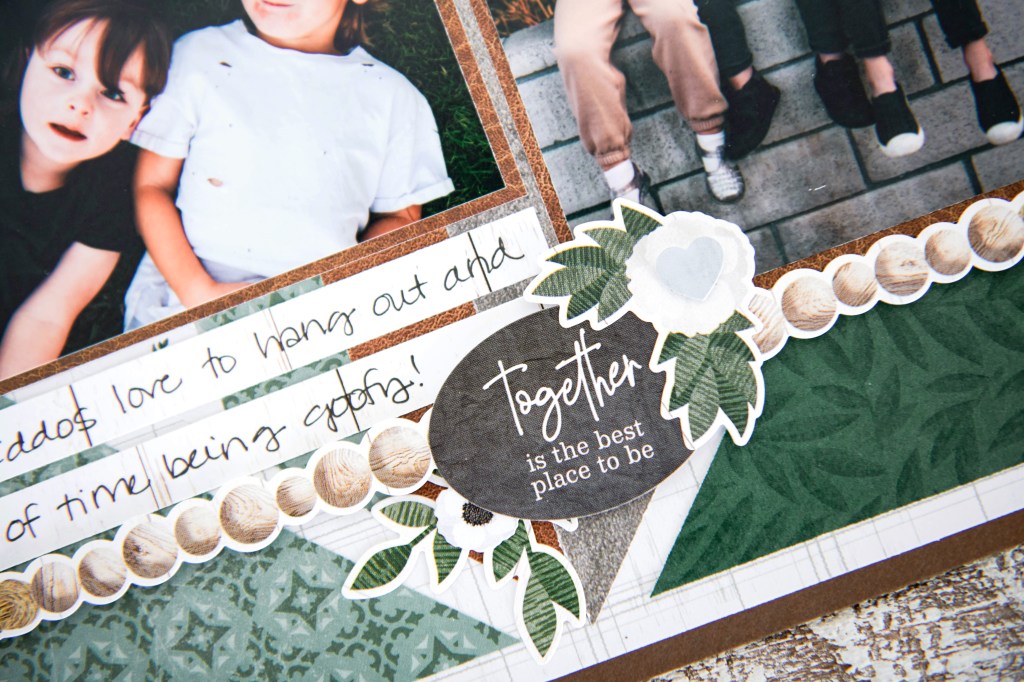
Step 13: Adhere stickers, using Foam Squares on some for added dimension.
What memories would you highlight in this family scrapbook layout? What projects have you created with the Homestead collection? Share your thoughts, insights, project ideas and more — you never know who YOU may inspire!

Wonderful layout! I really appreciate all the detailed instructions and sizing. Very helpful. I haven’t seen family for 21 months, but I have some 2019 vacation photos of lighthouses. I could go with that. :-)
What a lovely page! TYFS. :)
[…] #5 — a pleasing project that’s perfect for showcasing family memories! Follow the steps in this post to make it […]
I have been told I can search this blog by tools the tools used in the layouts, is this true? How about paper patterns, could i search this way too? It would sure be helpful if I could. Hard to keep up with the volume that comes to my inbox! Love all the layouts submitted. thanks, Liz Blatchley
On Thu, Apr 15, 2021 at 4:35 PM Creative Memories Blog wrote:
> melissaullmann posted: ” Family is everything. They’re the ones (whether > by blood or not) who have your back and pick you up when you need support, > the companions who love you no matter what, the folks who cheer you on as > you celebrate successes in life and the people who laugh ” >
so glad for detailed instructions, could not have done with out new trimmer