August 4, 2021
Enjoy New Thrills With This Amusement Park Layout: Scrapbook Paper Folding Technique and Design
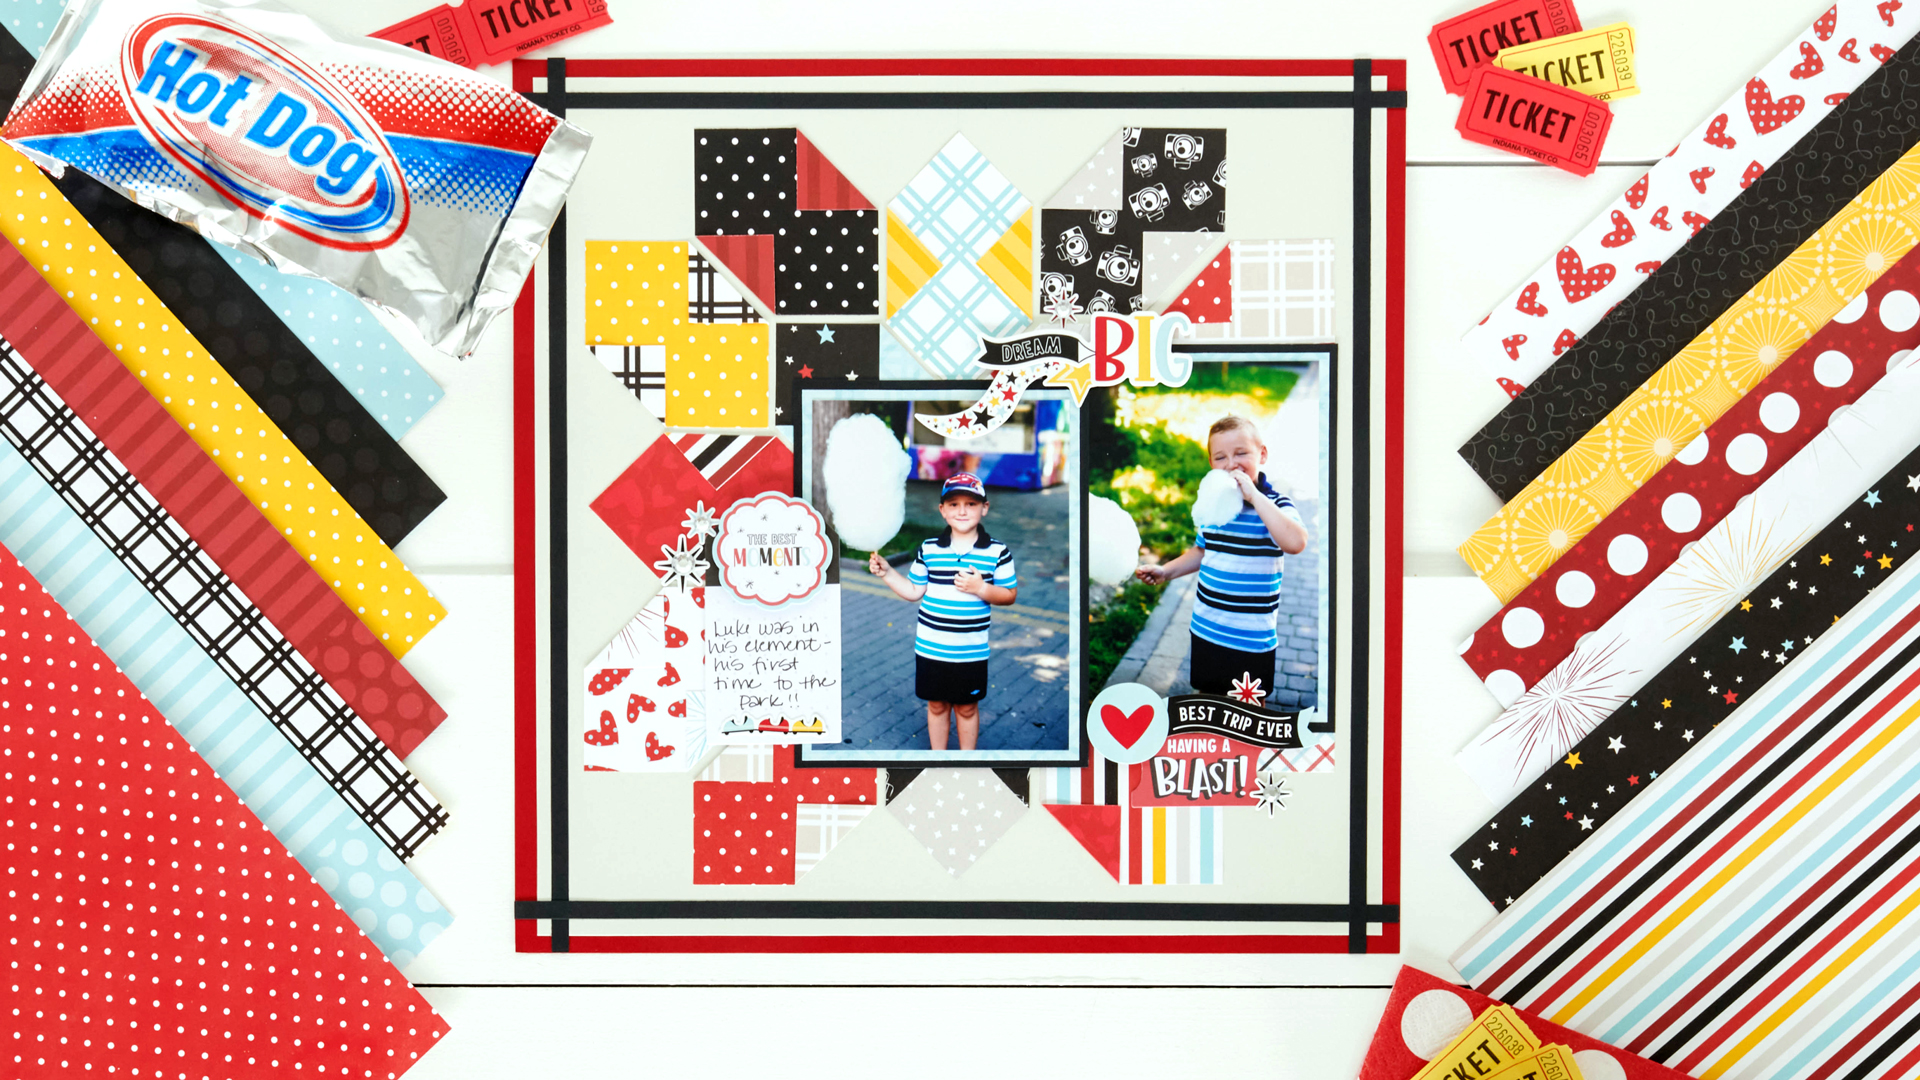
Amusement parks, theme parks, water parks… all of these parks are tickets to a great time! And within these moments of magic, whether it’s for your first time or 100th, make for some of the best memories and photo ops… which only means it’ll make way for some thrilling layouts! Get in line and marvel at this amusement park layout for starters. (Psst, it features a dynamic scrapbook paper folding technique and design to really bring on the excitement!)

To create this layout you will need:
- Sparks of Magic Paper Pack or (Shop Canada | Shop Australia)
- Sparks of Magic Tone-on-Tone Paper or (Shop Canada | Shop Australia)
- Sparks of Magic Stickers or (Shop Canada | Shop Australia)
- Sparks of Magic Embellishments or (Shop Canada | Shop Australia) – Coming soon! Visit the website for expected arrival.
- Cranberry, Light Gray & Black Solid Cardstocks or (Shop Canada | Shop Australia)
- 12-inch Trimmer with Straight & Scoring Blades or (Shop Canada | Shop Australia)
- Tape Runner or (Shop Canada | Shop Australia)
- Repositionable Tape Runner or (Shop Canada | Shop Australia)
- Foam Squares or (Shop Canada | Shop Australia)
- Black Dual-Tip Pen or (Shop Canada | Shop Australia)
- Pencil
- Ruler
- Eraser

Step 1: Use the Cranberry Solid Cardstock as the base for the layout.
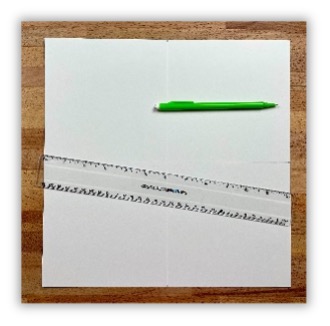


Step 2: Using a piece of Light Gray Cardstock, draw pencil lines with a ruler at the 6″ marks both vertically and horizontally. Cut 16 pieces that measure 2-1/2″ x 2-1/2″ of a various designer and tonal papers. Aligning the tips at the 1″ mark, score the tips on each side. Fold those tips over to show the back side of the papers and adhere.

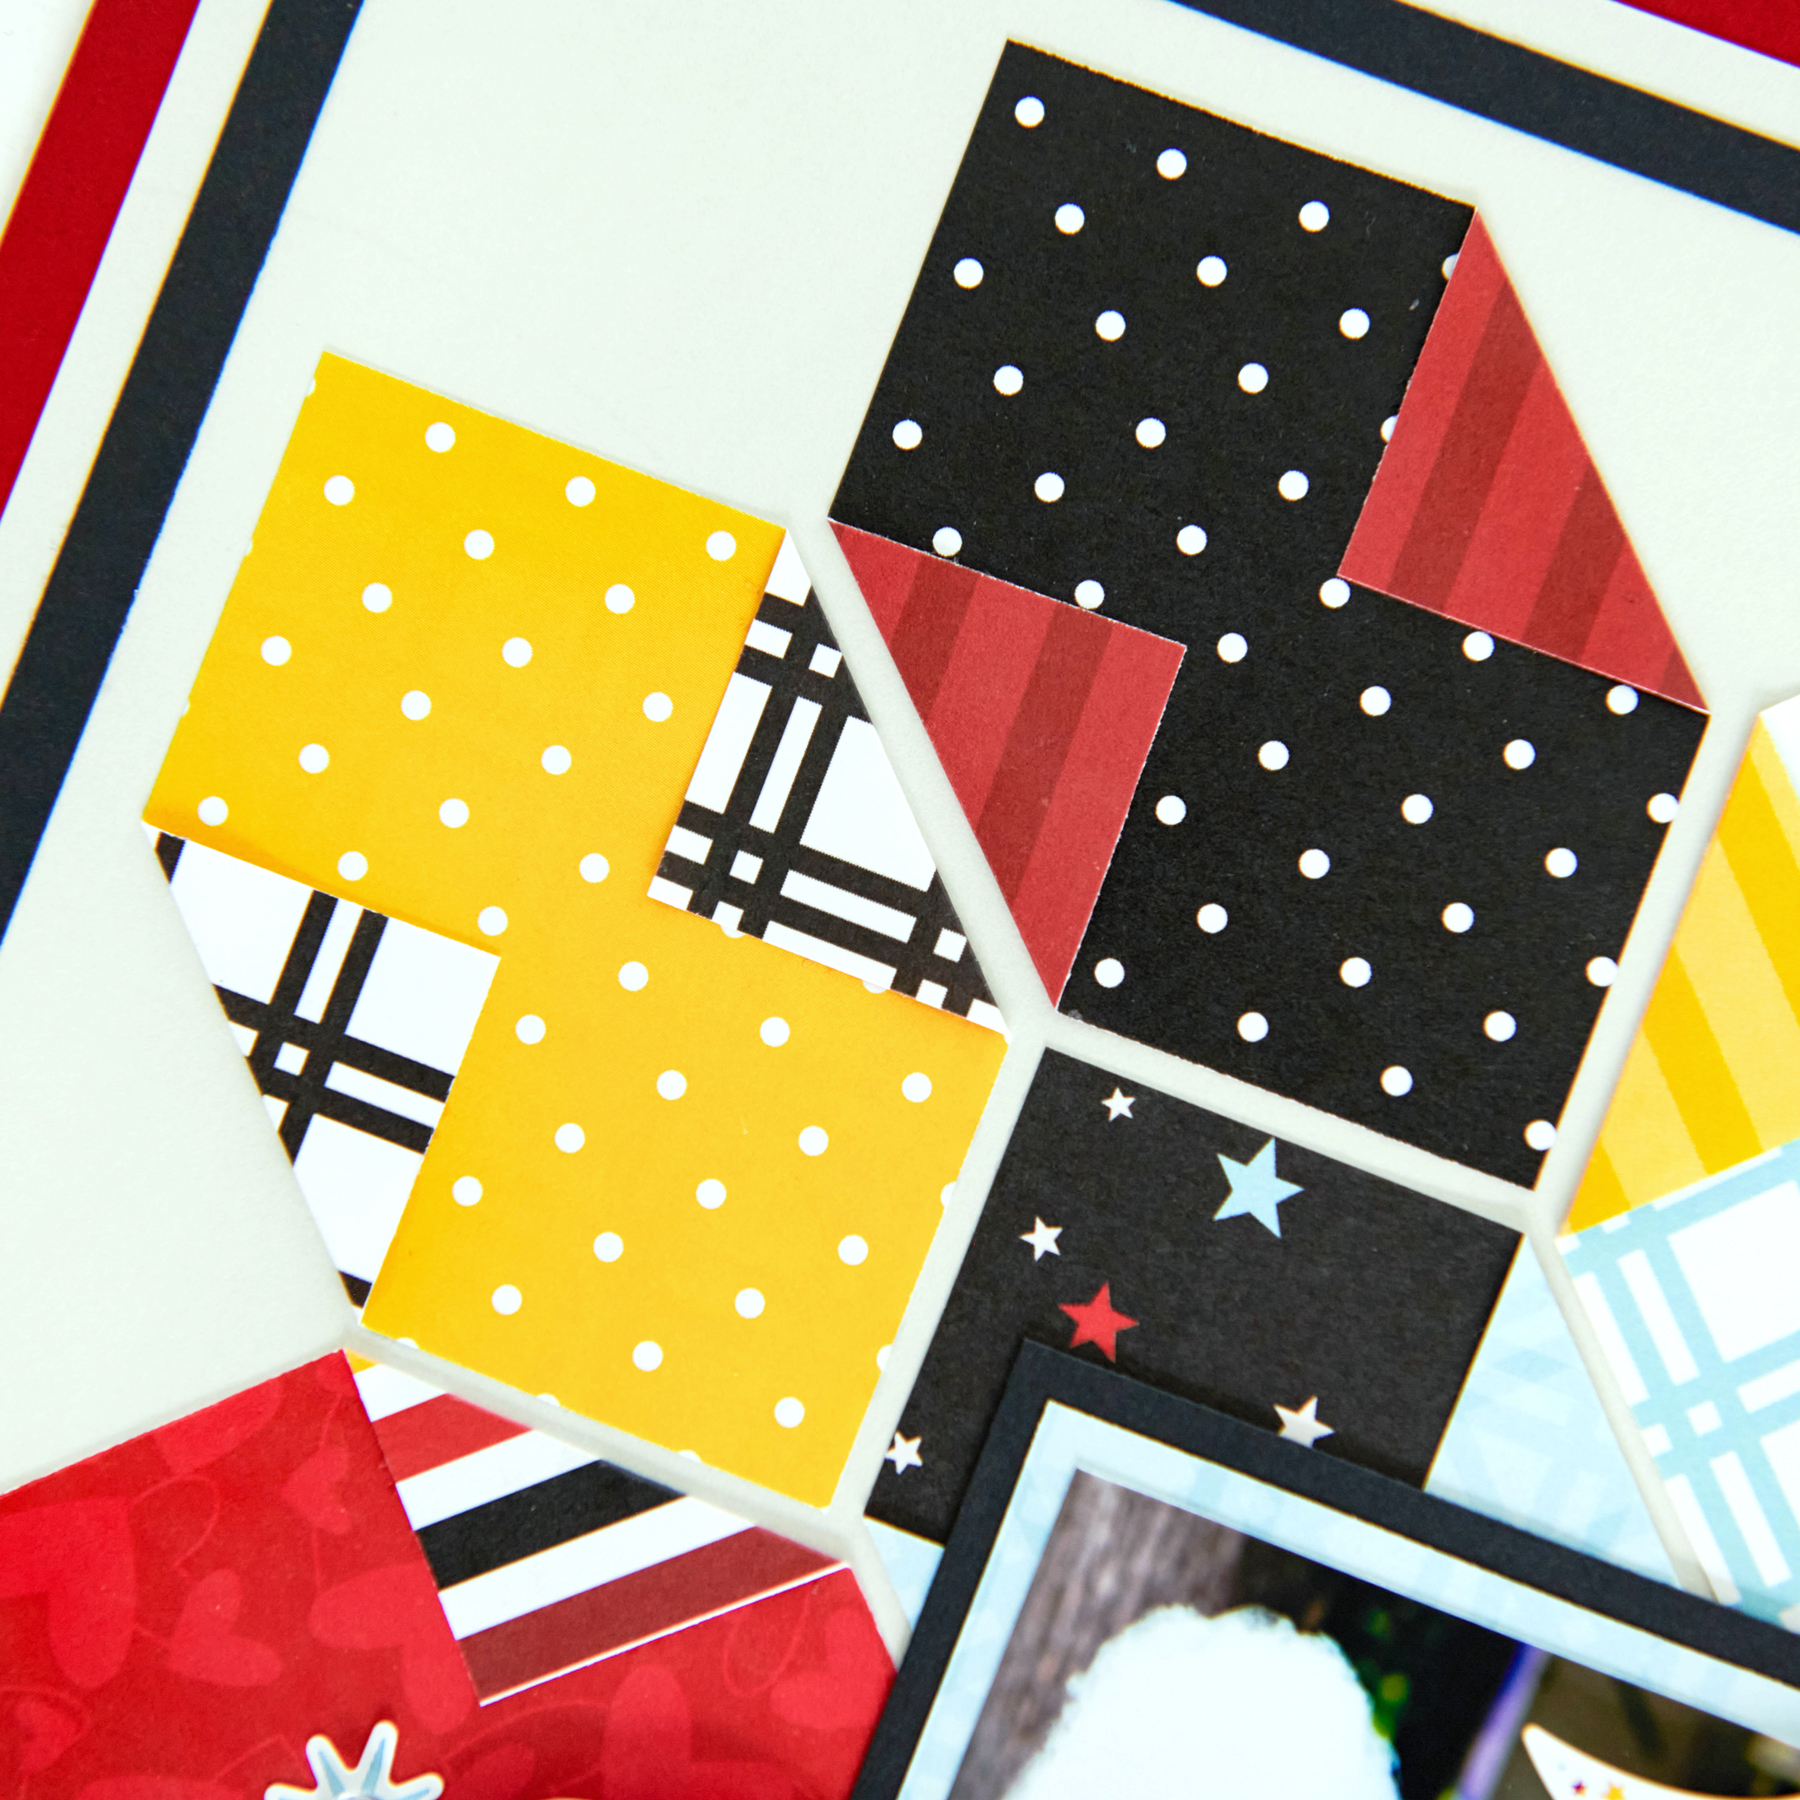
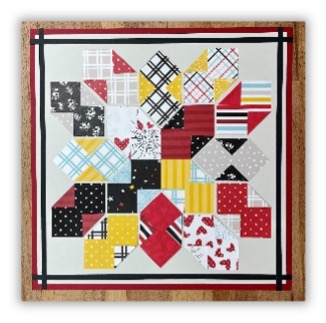
Step 3: Starting in the middle of the gray cardstock, adhere the pieces, working your way outward.
Step 4: Trim 1/4″ from the edges of all four sides of the gray cardstock. Adhere gray cardstock piece to the base of the layout.
Step 5: Cut four pieces of Black Solid Cardstock to measure 12″ x 1/4″. Adhere to the layout approximately 1/2″ from the edges of each side of the cranberry cardstock base.
Step 6: Cut two pieces from the Black Solid Cardstock to measure 4″ x 5-1/4″ for photo mats. Cut two pieces from the light blue designer paper to measure 3-3/4″ x 5″. Adhere these to the black cardstock and then adhere mats to the layout. Adhere photos: (2) 3-1/2″ x 4-3/4″.
Step 7: Adhere stickers and embellishments to the layout, using Foam Squares on some for added dimension. Journal as desired.
Are you going to try out this scrapbook paper folding technique? What photos would you display on this amusement park layout? Feel free to drop your thoughts in the comments section!

What a marvelous idea! I love it.
So cool!
So striking! Love it!
The measurements aren’t working for me. What I’ve found that does work are 2.25” squares and scoring/folding at the .75” mark.
This is so intriguing. I believe I must give this a go!
I don’t understand the directions. Why draw lines at 6″ on gray? How many 21/2″squares do I fold corners on and how many corners on each square? I think the squares do not cover the entire gray is that correct? Next the gray is adhered to cranberry??
Step 1 says use the Cranberry cardstock as the base.
Step 2 says to draw a line both vertically and horizontally ( which you are going to use to center and start laying your pieces at. See picture above which shows the first four pieces perfectly. Also in step 2 it says to cut (16) 2 1/2” x 2 1/2” pieces and then score at two sides at the 1” measure.
Step 3 is where you begin placing your pieces as shown with the first 4 pieces.
Step 4 is where you not only trim all four sides of the gray cardstock but you apply the gray cardstock to the base which in step 1 says the base is the cranberry. I think you’ve got it from here.
Thank you.
This is really adorable and such a clever use of CM’s beautiful two sided paper! Can’t wait to head to my craft room and try this!!
[…] keep the good times rolling — check out this blog post to see how you can create a thrilling paper folding technique and design for your next […]
Really clever and artsy. looks like its gonna be fun. Thanks!