April 24, 2023
April Completed Album Challenge PLUS A Camping Scrapbook Layout

One, two, three, four — here is a challenge you’ll adore! That’s right, it’s the last week of the month, which means another Completed Album Challenge! And if you’re ready for this new adventure (as well as a camping scrapbook layout) to pitch a perfect, completed album — and then show us what you’ve got on the Virtual Crop Facebook Group — let your creative compass guide you this way! ??
If you completed an album this month (does not need to be from start to finish in April, just completed in April), make a short video flipping through each of the pages in your newly completed album. Then, post your video in the Virtual Crop Facebook Group with the hashtag #CompletedApril2023 for the chance to win!
Here’s an example of what your Completed Album Challenge video could look like!
For ALL the details on the Completed Album Challenge, check out this blog post.
- Set Up Camp Paper Pack or (Shop Canada | Shop Australia)
- Set Up Camp Stickers or (Shop Canada | Shop Australia)
- Hot Fudge Solid Cardstock or (Shop Canada | Shop Australia)
- Square Punch or (Shop Canada | Shop Australia)
- 12-inch Trimmer or (Shop Canada | Shop Australia)
- Micro-Tip or All-Purpose Scissors or (Shop Canada | Shop Australia)
- Tape Runner or (Shop Canada | Shop Australia)
- Repositionable Tape Runner or (Shop Canada | Shop Australia)
- Foam Squares or (Shop Canada | Shop Australia)
- CM Zero-Centering Ruler or (Shop Canada | Shop Australia)
- Brown Dual-Tip Pen or (Shop Canada | Shop Australia)
- Pencil/eraser

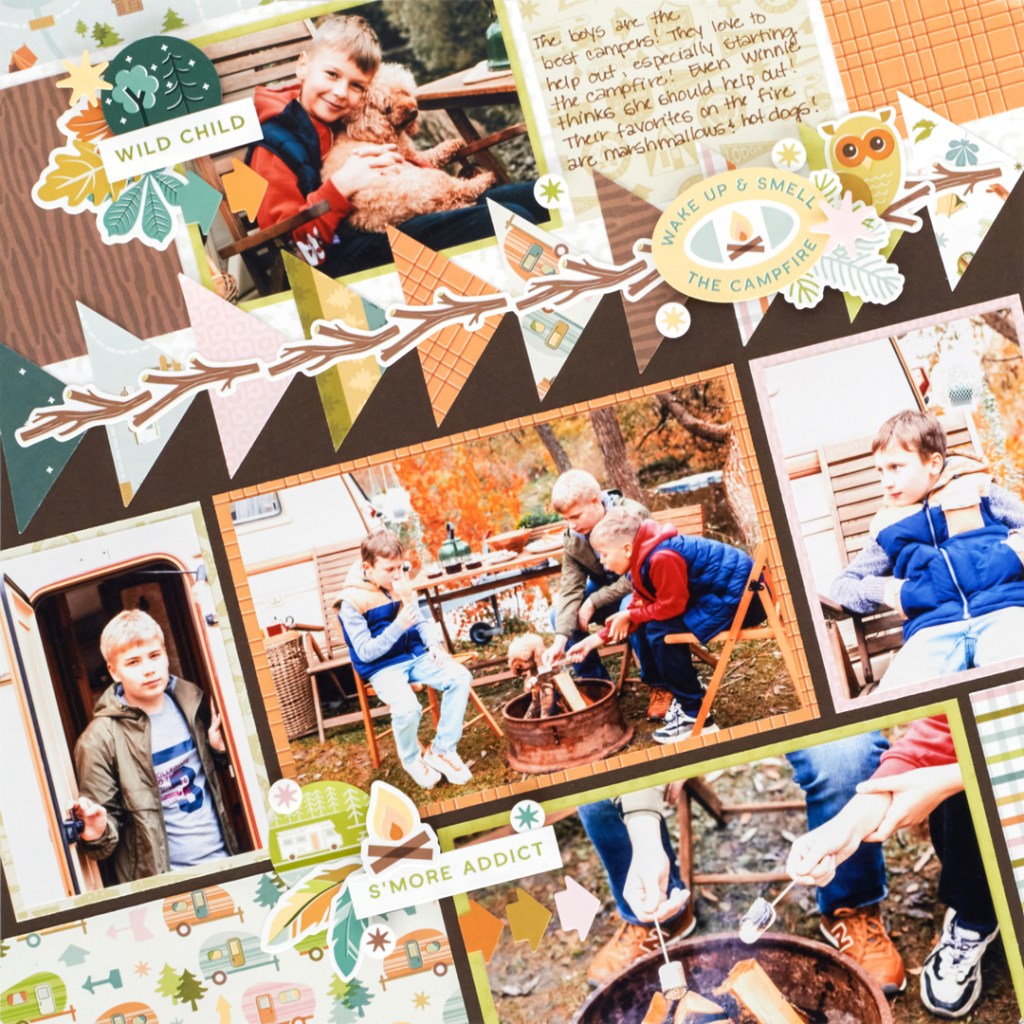
Step 1: Use a piece of Hot Fudge Solid Cardstock as the base for the layout.
Step 2: Using the piece of off-white arrows paper, measure 5” down from the upper-left corner leaving a pencil mark. Measure down 2” from the upper-right corner along the right edge of the paper. Use your 12-inch Trimmer to cut from pencil mark to pencil mark. Adhere the angled piece of off-white paper to the top edge of the cardstock.
Step 3: Using the Square Punch, punch five squares from a variety of papers. Use the 12-inch Trimmer to cut from corner to corner to create triangles. Adhere triangle pieces along the angled edge of the off-white paper. Trim off any excess with scissors.
Step 4: Cut photo mats to measure (2) 6-1/4” x 4-1/4”, (1) 4-1/4” x 3-1/4” and (2) 3-1/4” x 4-1/4”.
Step 5: Adhere photos that measure (2) 6” x 4”, (1) 4” x 3” and (2) 3” x 4”.
Step 6: Adhere mats/photos to the layout.
Step 7: Cut a variety of papers to fill in the corners — (4) 3-1/4” x 3-1/4” and (2) 5-1/2” x 3” . Use your scissors or 12-inch Trimmer to trim away the excess hanging off the edge of the cardstock.
Step 8: Adhere stickers, using Foam Squares on some for added dimension.
Step 9: Journal as desired.
Alrighty, scrappers — are YOU ready to take on the astounding April Completed Album Challenge? Will you be foraging up your scrapbook supplies and trying out this camping scrapbook layout idea? Have fun, post your video and good luck with your album-making adventure (and possible win!).
P.S. Are YOU a member of the Virtual Crop Facebook Group? It’s your go-to place for MONTHLY Virtual Crops, MONTHLY Completed Album Challenges, WEEKLY LIVE STREAMING of Fast & Fun Projects with Noreen, LIVE QUARTERLY Secret Box Openings with project tutorials and so much more! We hope you’ll join our community of more than 31,000 fellow memory-keeping enthusiasts — you’ll feel right at home!

Where is the layout?