July 16, 2016
Creative Memories July Virtual Crop: Challenge 1

Welcome!
We are SOOOO glad that you joined us for the July Virtual Crop!
We have so many ideas that we hope will inspire you today!
Welcome back to those of you who have virtually cropped with us before, and a BIG warm welcome to all you newbies!
If you are new, you might be asking yourself “What is a Virtual Crop, and WHY am I here?”
Let me help answer that!
First and foremost—no need to get out of your jammies! Just make yourself a cup of tea/coffee, grab a few photos, along with some scrappy supplies! (Oh, and you will DEFINITELY need some chocolate!)
We will be hosting several challenges right here on the blog, and posting to the events page on Facebook!
Please post your completed pages on the Facebook Events Page to qualify for the door prizes that will be given away throughout the day. If you have any questions, just ask in the comments section of each post either here on the blog or on the Facebook Page.
We would like to start off the challenges with a sketch created by Noreen Smith, one of our awesome Content Contributors! .
Noreen includes a cutting guide in her sketches as well—to make it as simple as 1-2-3!
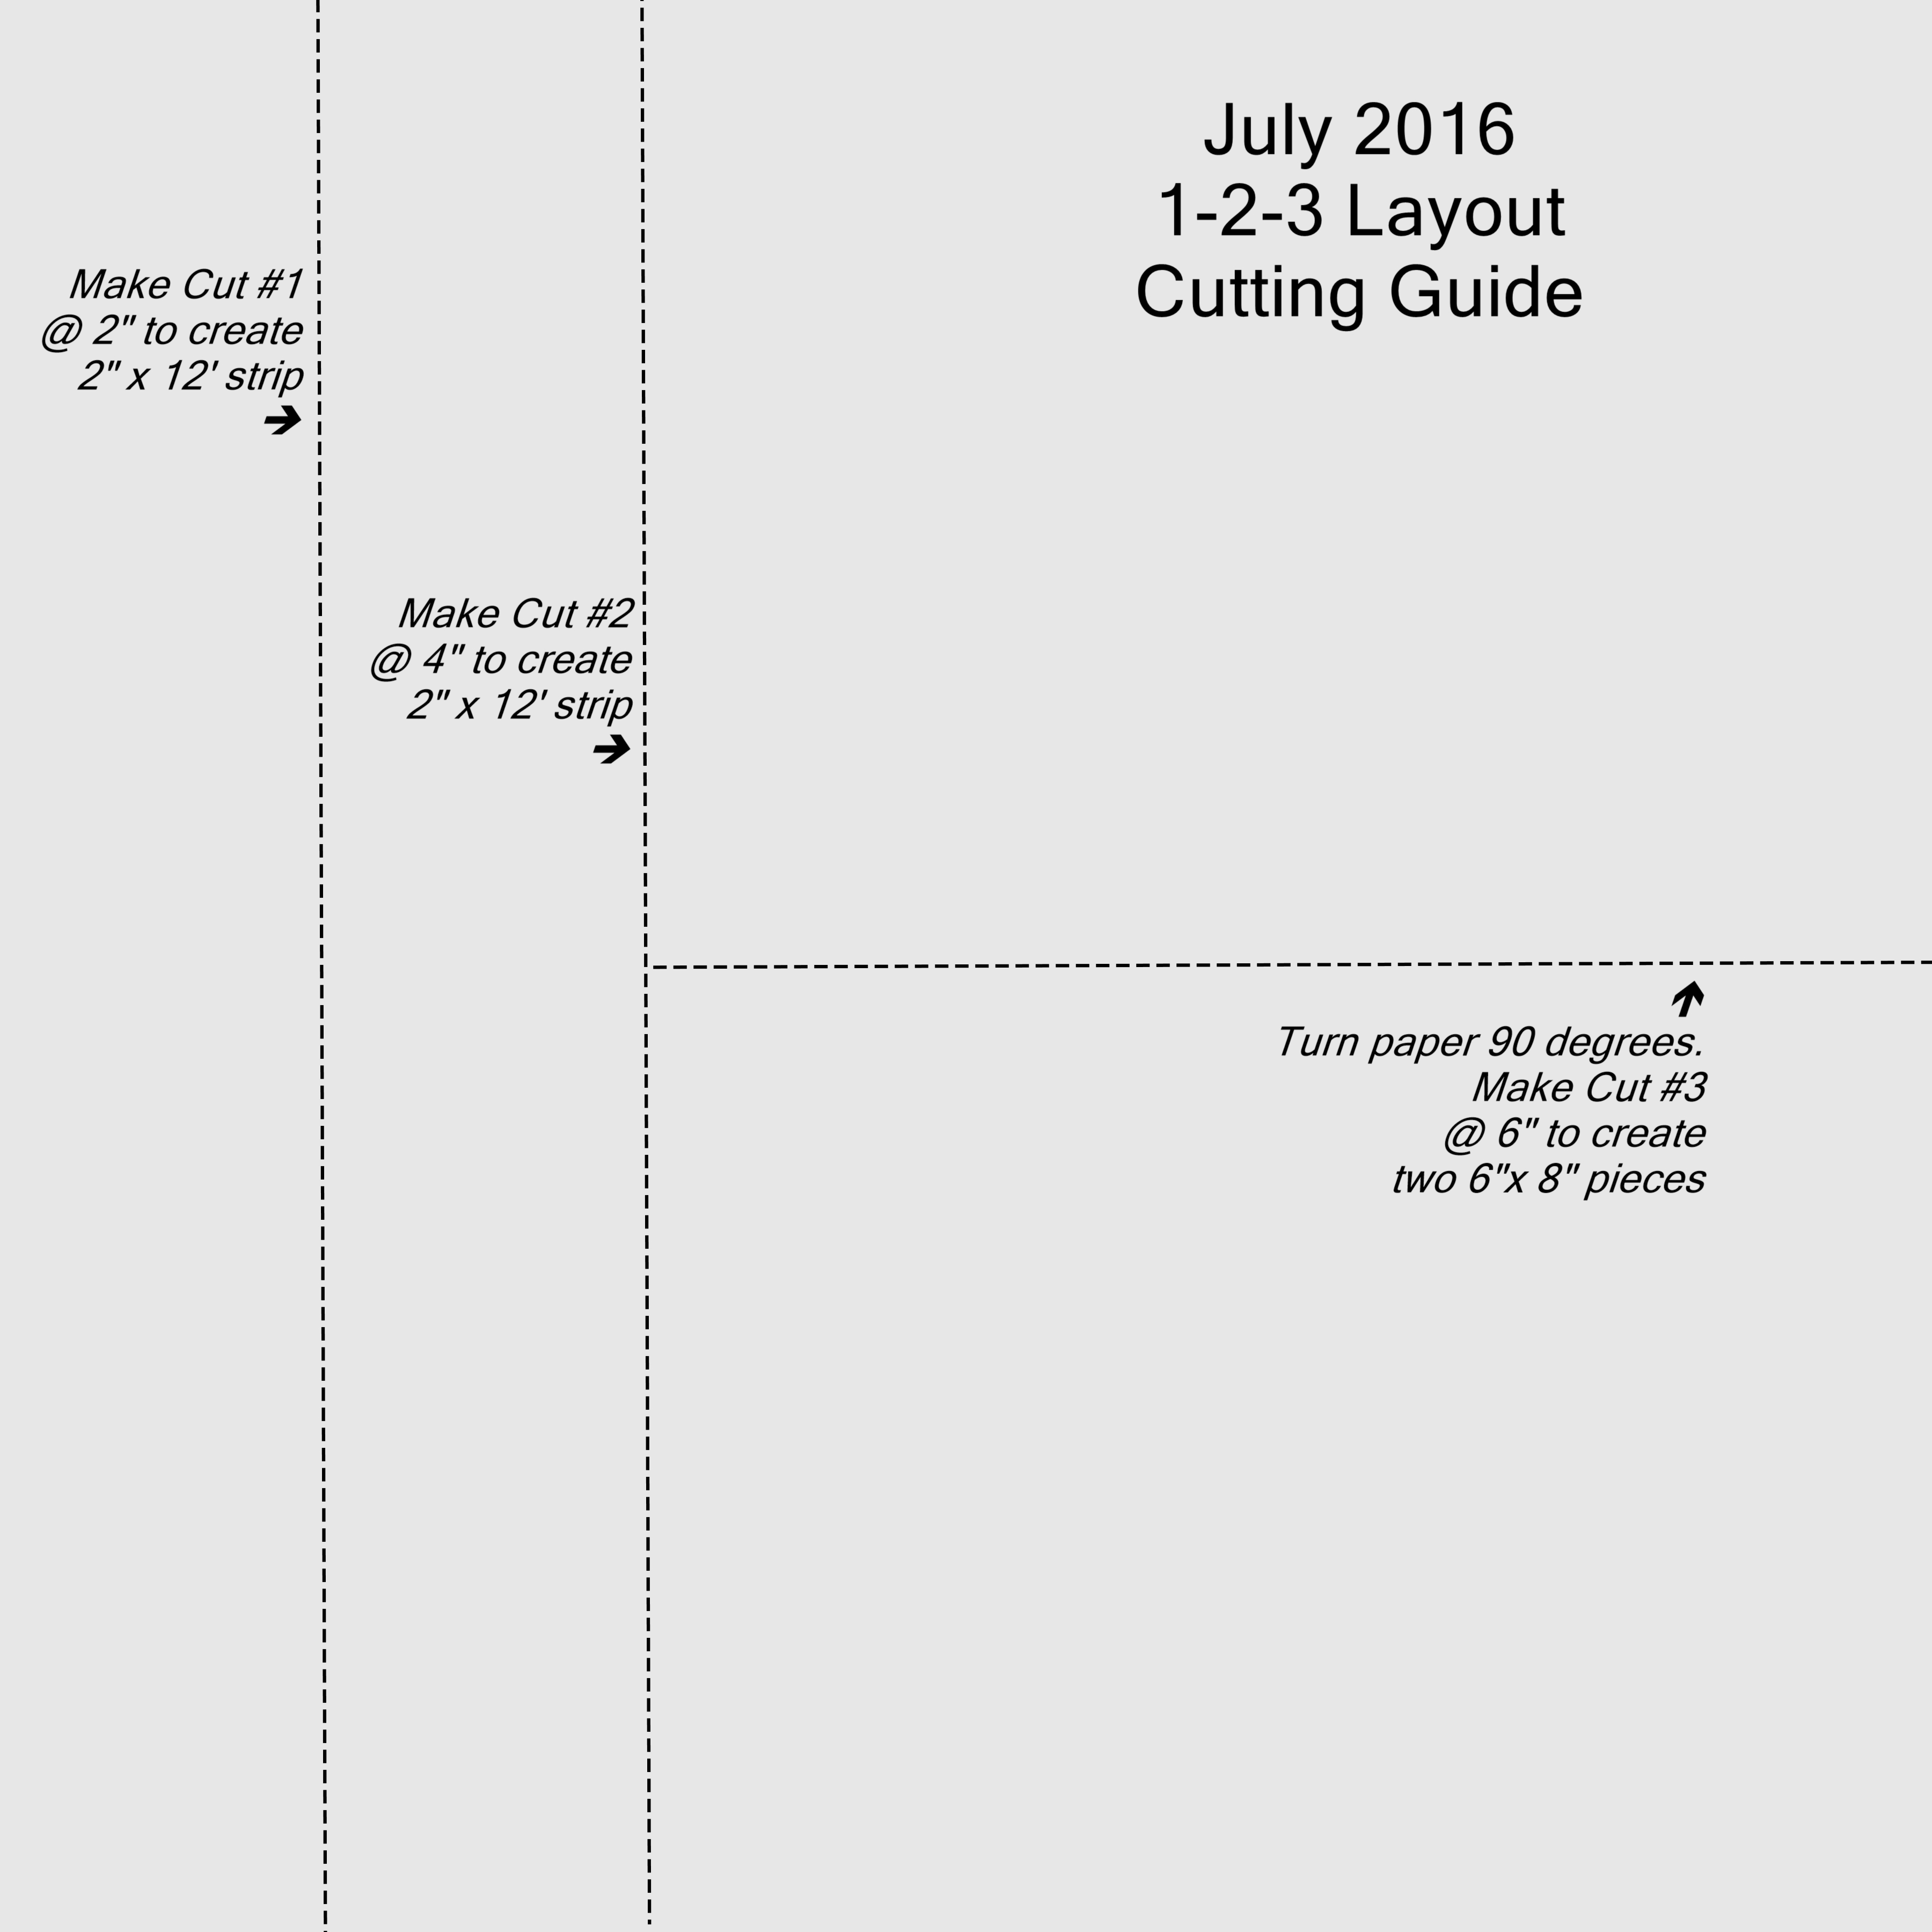
We asked our Content Contributors to create spreads using this sketch, and here are a few ideas that they came up with:
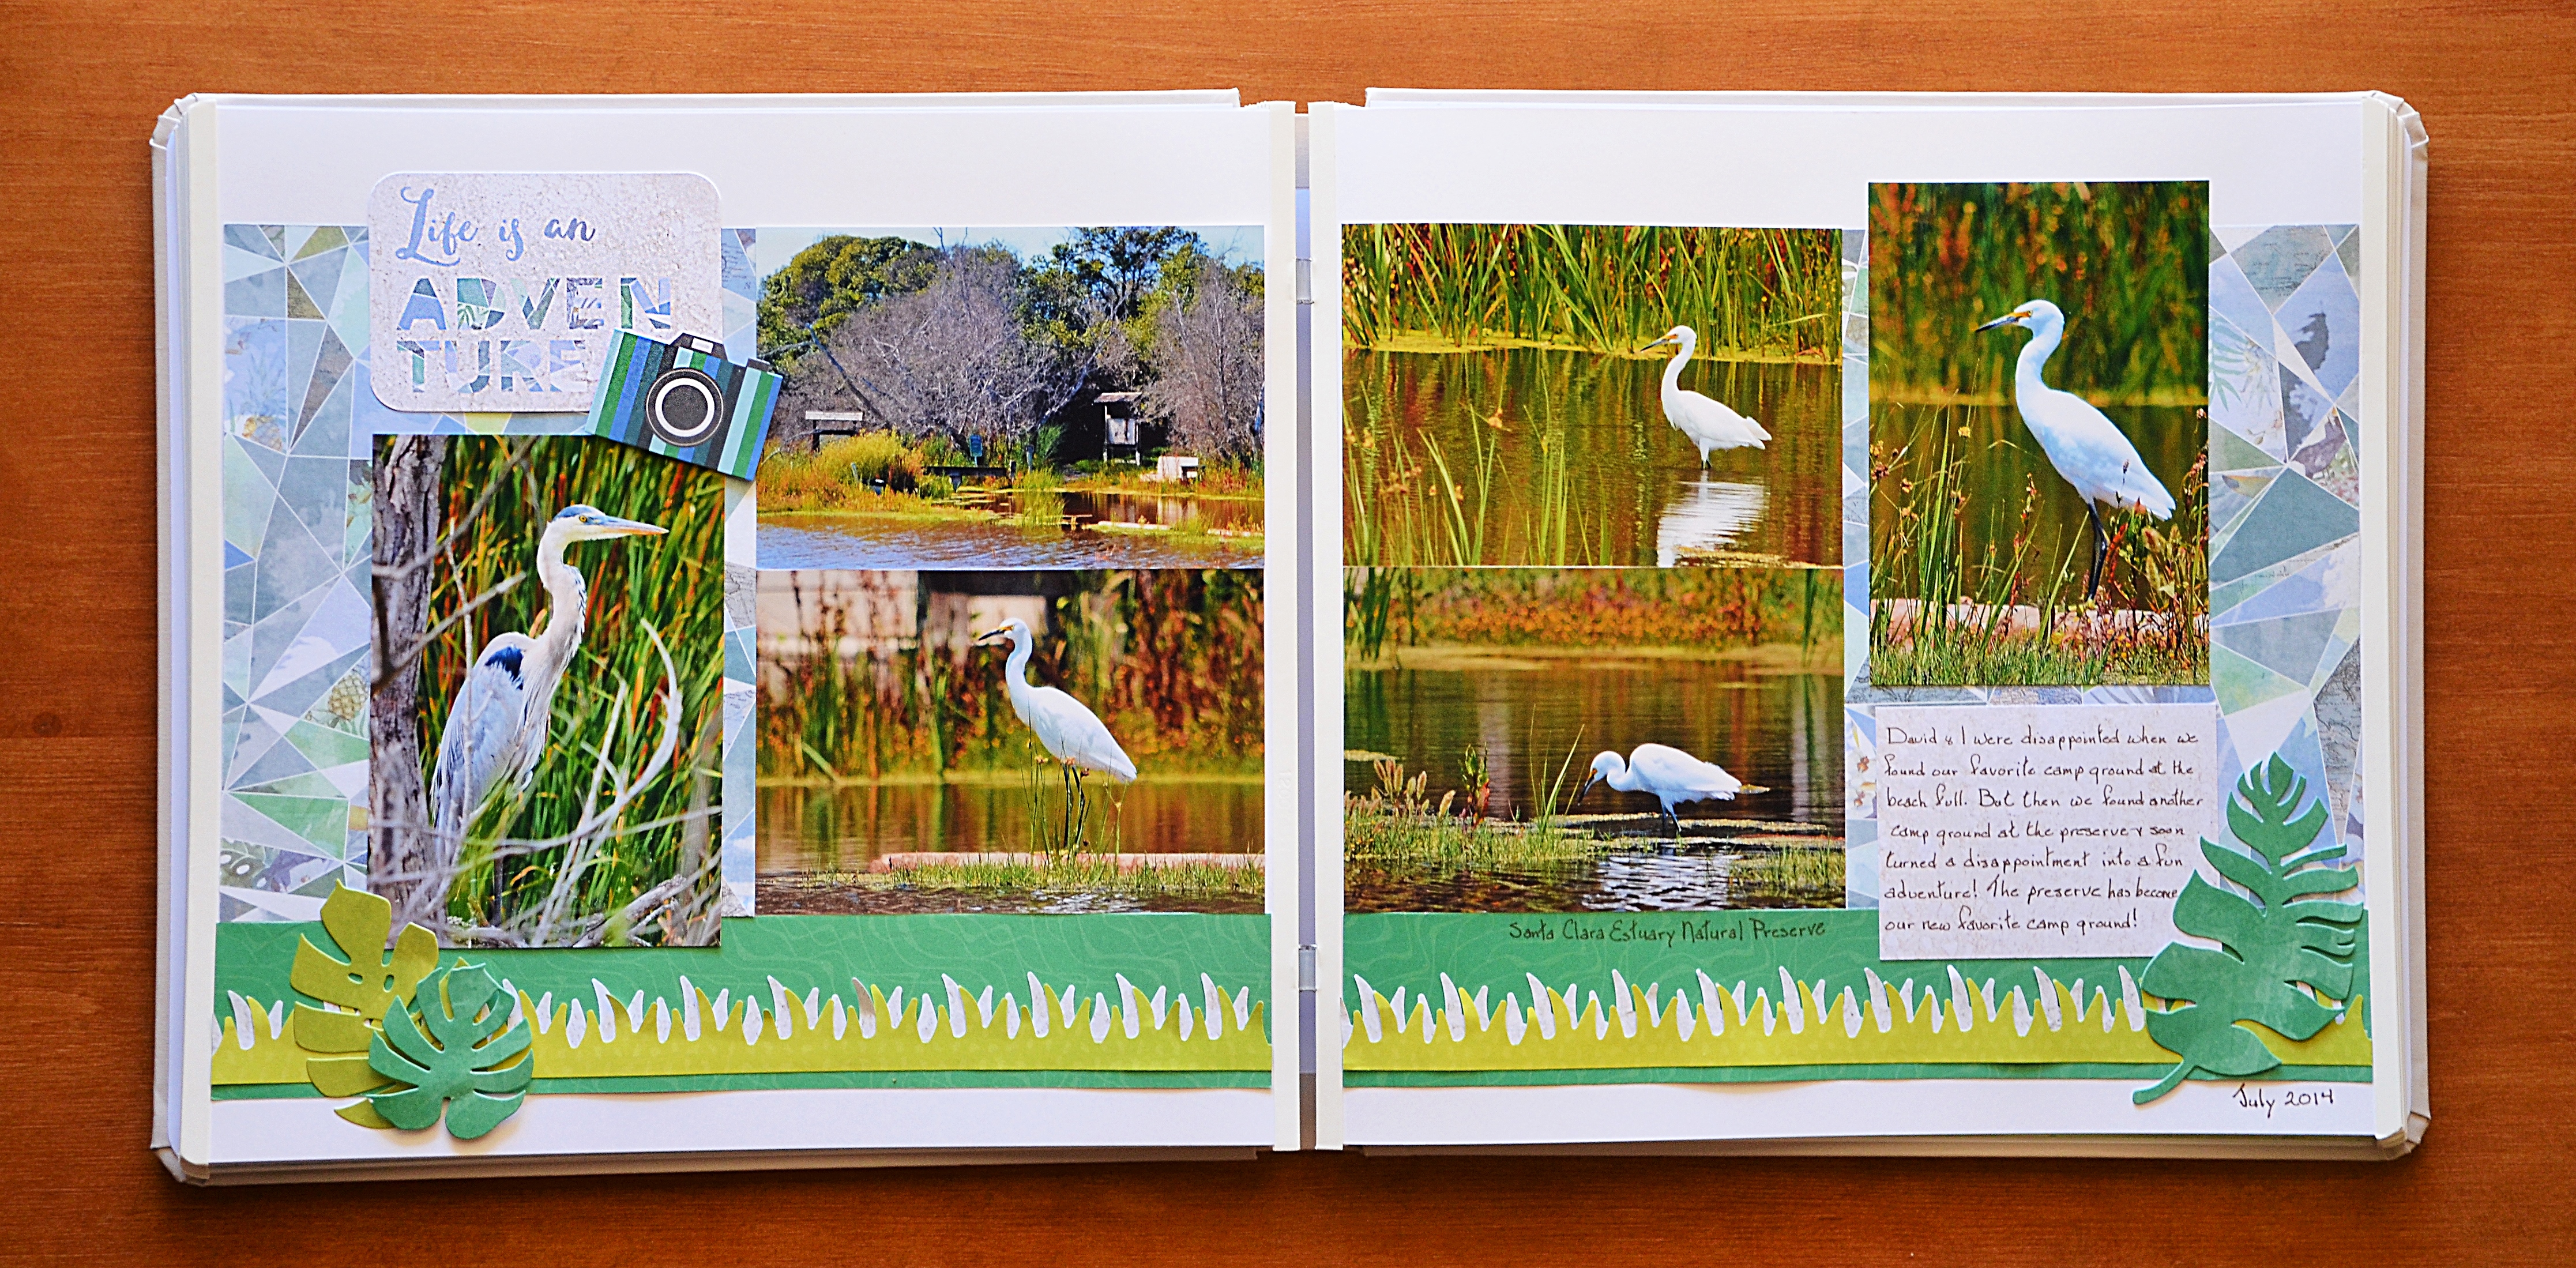
Created by Diane Brinsley-US:
Step 1: Cut pattern paper from Cool Serenity paper pack according to sketch directions. Adhere to 12 x 12 white refill pages as shown.
Step 2: Using the Border Maker & Grass cartridge, punch 2 grass borders from green pattern paper and 2 from sand pattern paper. Trim each to 1″ x 12″ and adhere as shown.
Step 3: Using the vertical “Life is an Adventure” slide-in from the Cool Serenity Slide-In pack, cut one 3″ x 4″ journal box and one 2 3/4″ x 4″ title box. Round corners of title box.
Step 4: Embellish layouts with Cool Serenity Embellishments.
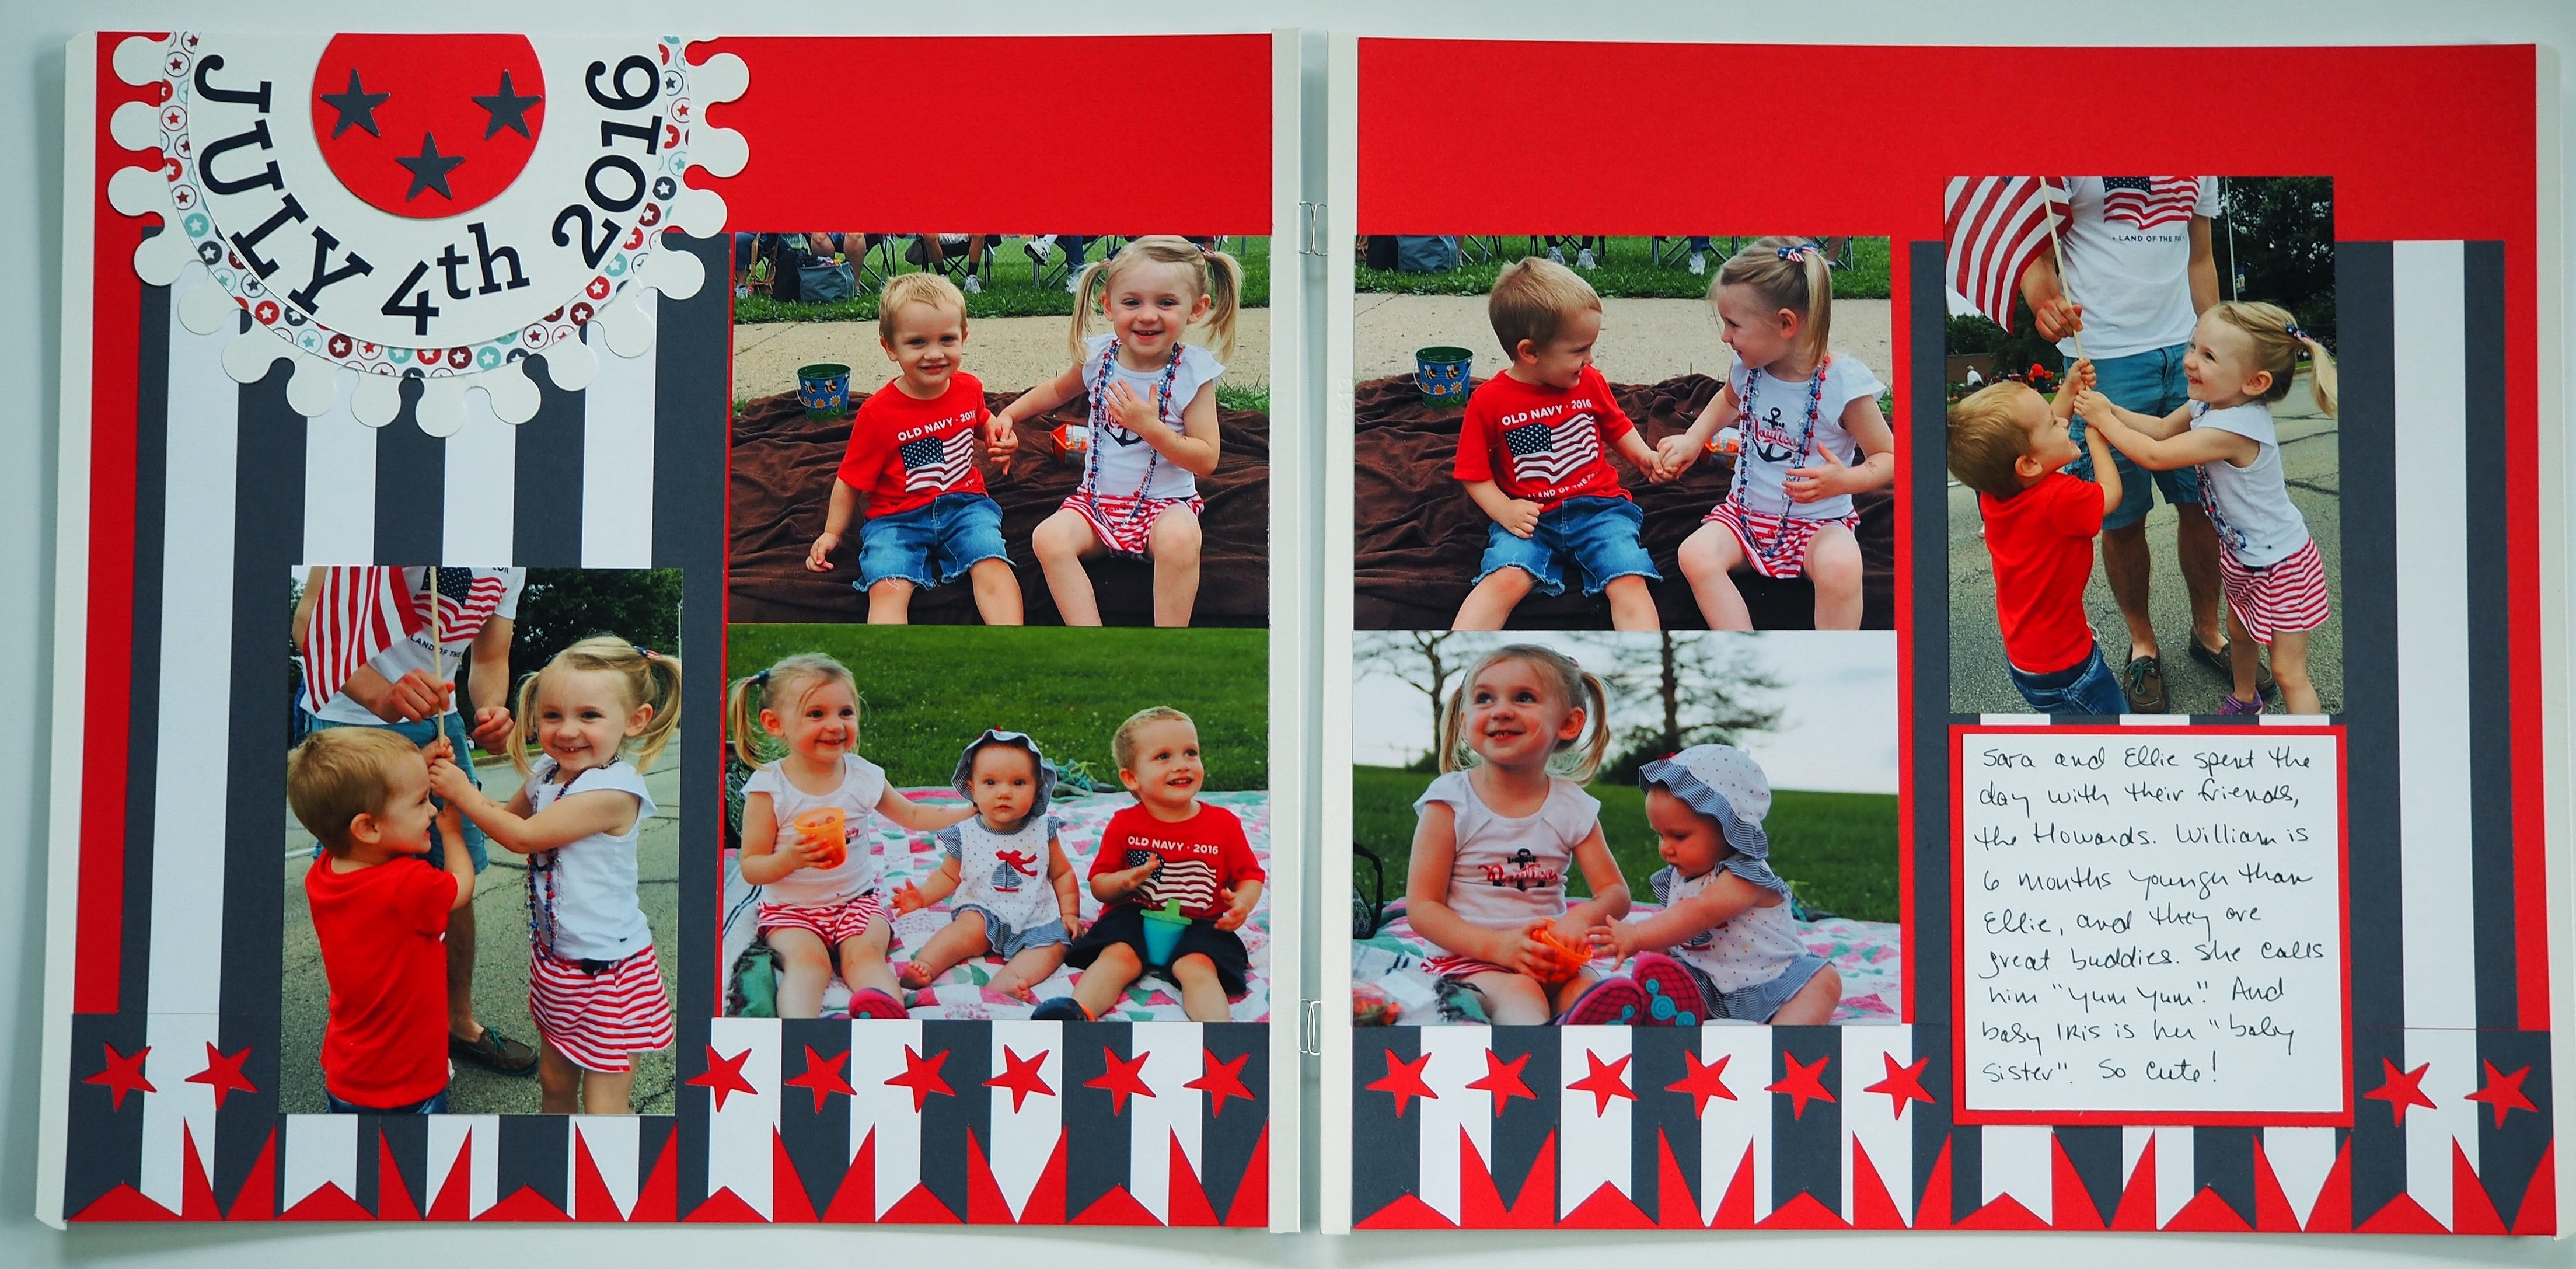
Created by Karyn McDermaid-Rolfe-US:
Ingredients:
- Triumph Paper Pack
- Red Cardstock
- White Cardstock
- Navy ABC/123 Stickers
- 12” Straight Trimmer
- All-Purpose Scissors
- Custom Cutting System with Circle Patterns
- Original Border Maker System with Crown and Star Cartridges
- Tape Runner
- Black Pen
Step 1: Using Original Border Maker with Star Cartridge, punch a border of stars on the blue striped paper. Cut off at 2 inches. Repeat.
Step 2: Turn remaining piece of paper 90 degrees and cut at 6 inches.
Step 3: In-between the stars on the 2-inch strips, use All-Purpose Scissors to cut vertical slits up to the bottom edge of the stars
Step 4: Using scissors, cut banner/flags as shown.
To make bunting title piece:
- Cut a red circle using the middle-sized circle cutting pattern and the red blade on the inside edge.
- Cut a white circle using the middle-sized circle cutting pattern and the red blade on the outside edge.
- Cut a patterned circle using the middle-sized circle cutting pattern and the blue blade on the outside edge. Adhere the circle pieces nested inside of each other
- Add title as shown, and then cut the top of off the entire piece to make a semi-circle as shown.
- Use Original Border Maker with Crown Cartridge to punch a border from white cardstock, and adhere relief pieces underneath and around the semi-circle piece.
- Adhere blue star relief pieces.
- For journaling box, cut a 4”x 4” square from red cardstock. Cut a 3.75”x 3.75” square from white cardstock and adhere to red square. Journal.
Assemble page and adhere as shown.
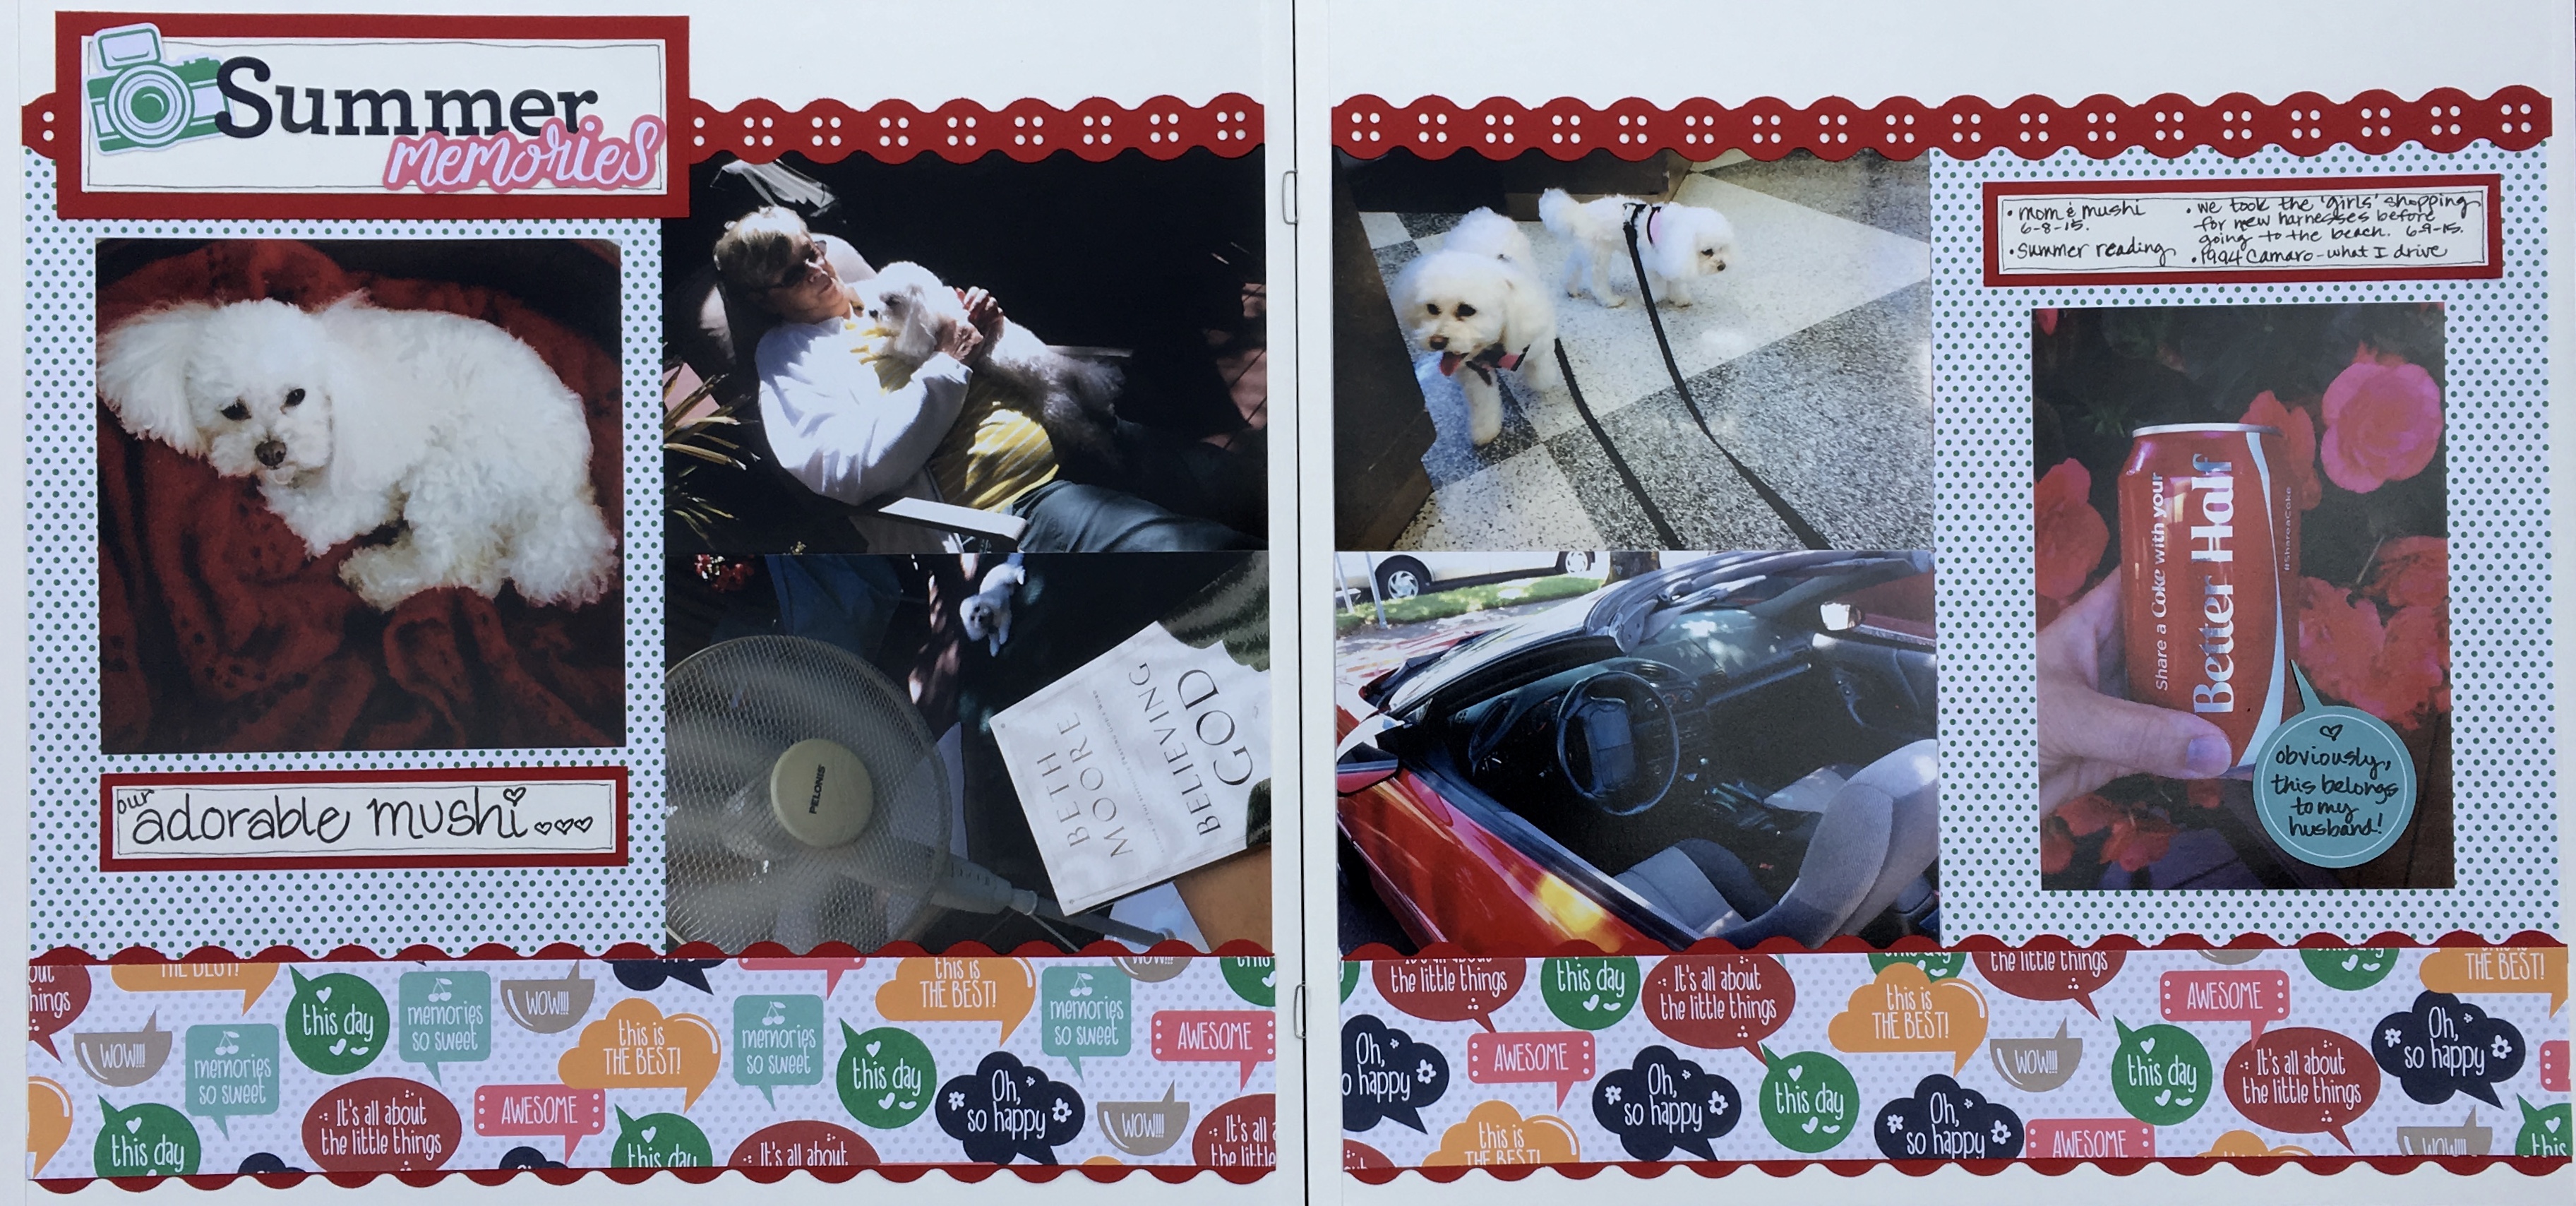
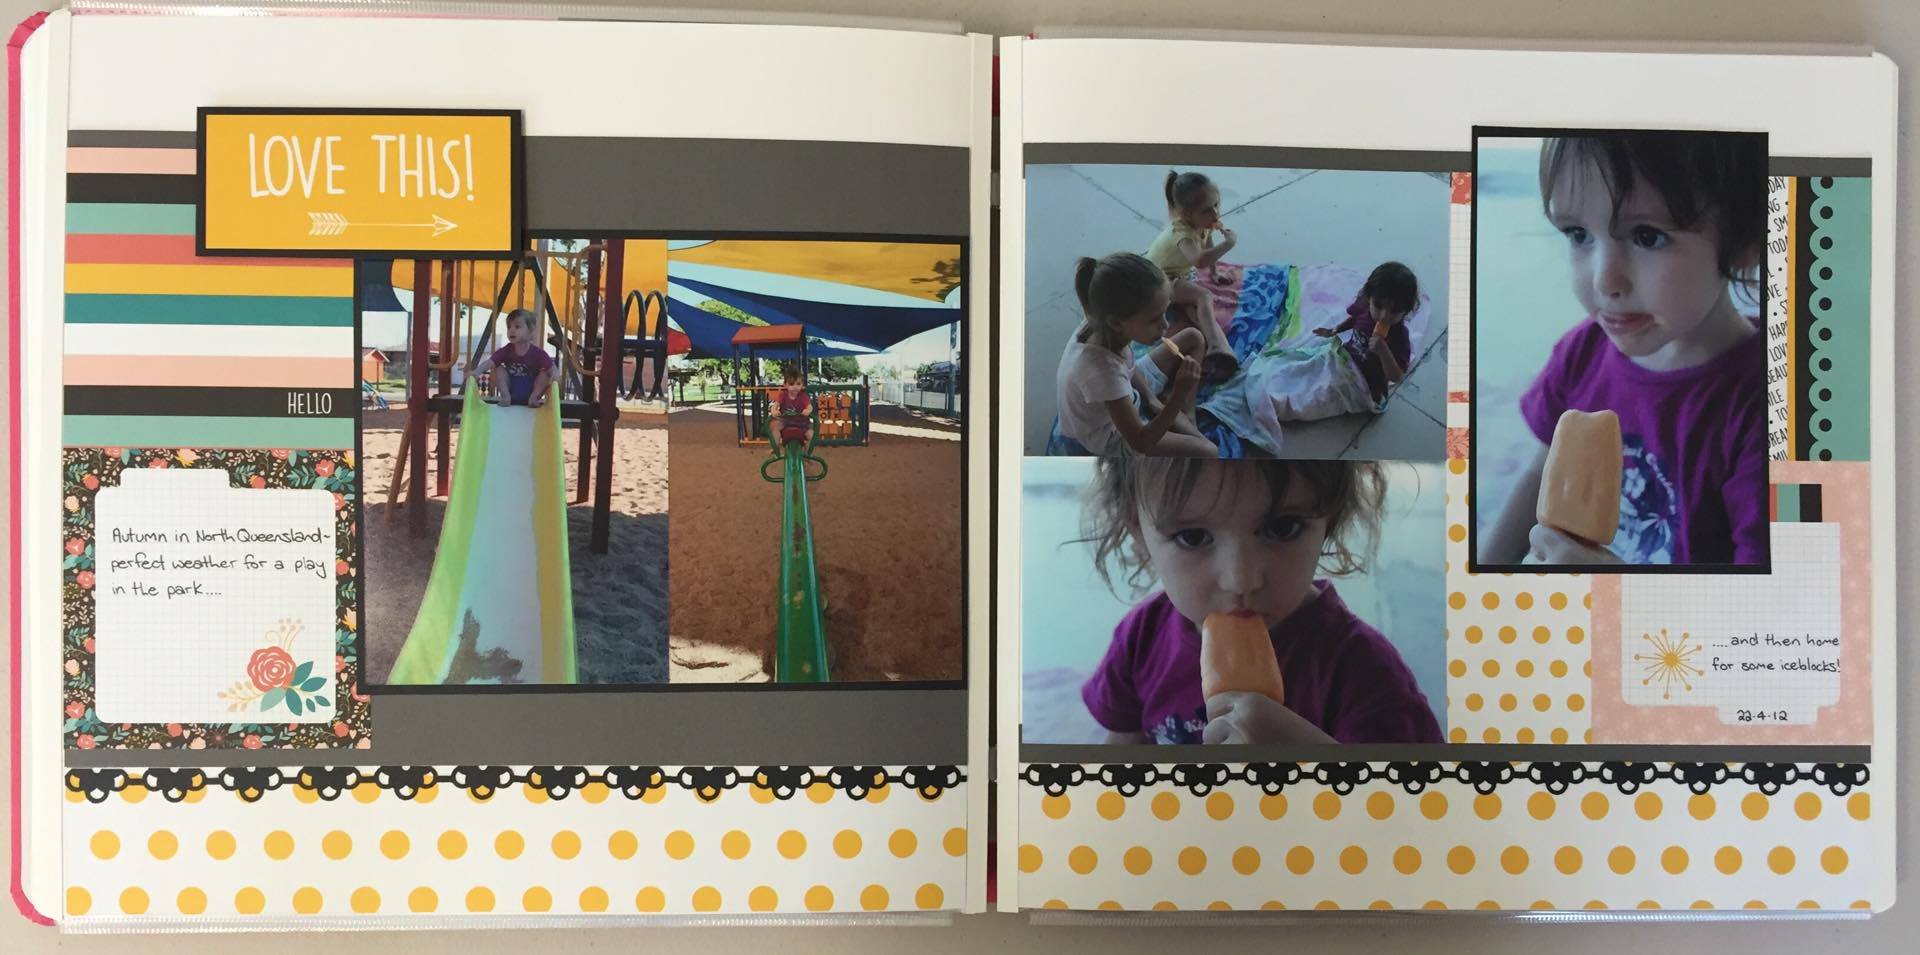
Created by Dayna Trueman Nelson-AUS:
Step 2: Using the Button Border Maker cartridge, create 4 12-inch borders from cranberry cardstock. Two of them are cut length-wise down the center and used to frame the strips at the bottom of the page.
Step 3: ‘Summer Memories’ Title Box: Cut cranberry cardstock 2″ x 6”. Cut white cardstock 1.5″ x 5.5”. Camera and ‘memories’ embellishments are from the ‘AYTR Embellishments – Part 2’ pack. ‘Summer’ was created from the navy ABC sticker pack.
Step 4: Journaling Boxes: Cut 2 cranberry cardstock rectangles 1” x 5”. Cut 2 white cardstock rectangles 3/4″ x 4 3/4”
Step 5: The green ‘talking bubble’ on the photo is also from the ‘AYTR Embellishments – Part 2’ pack.
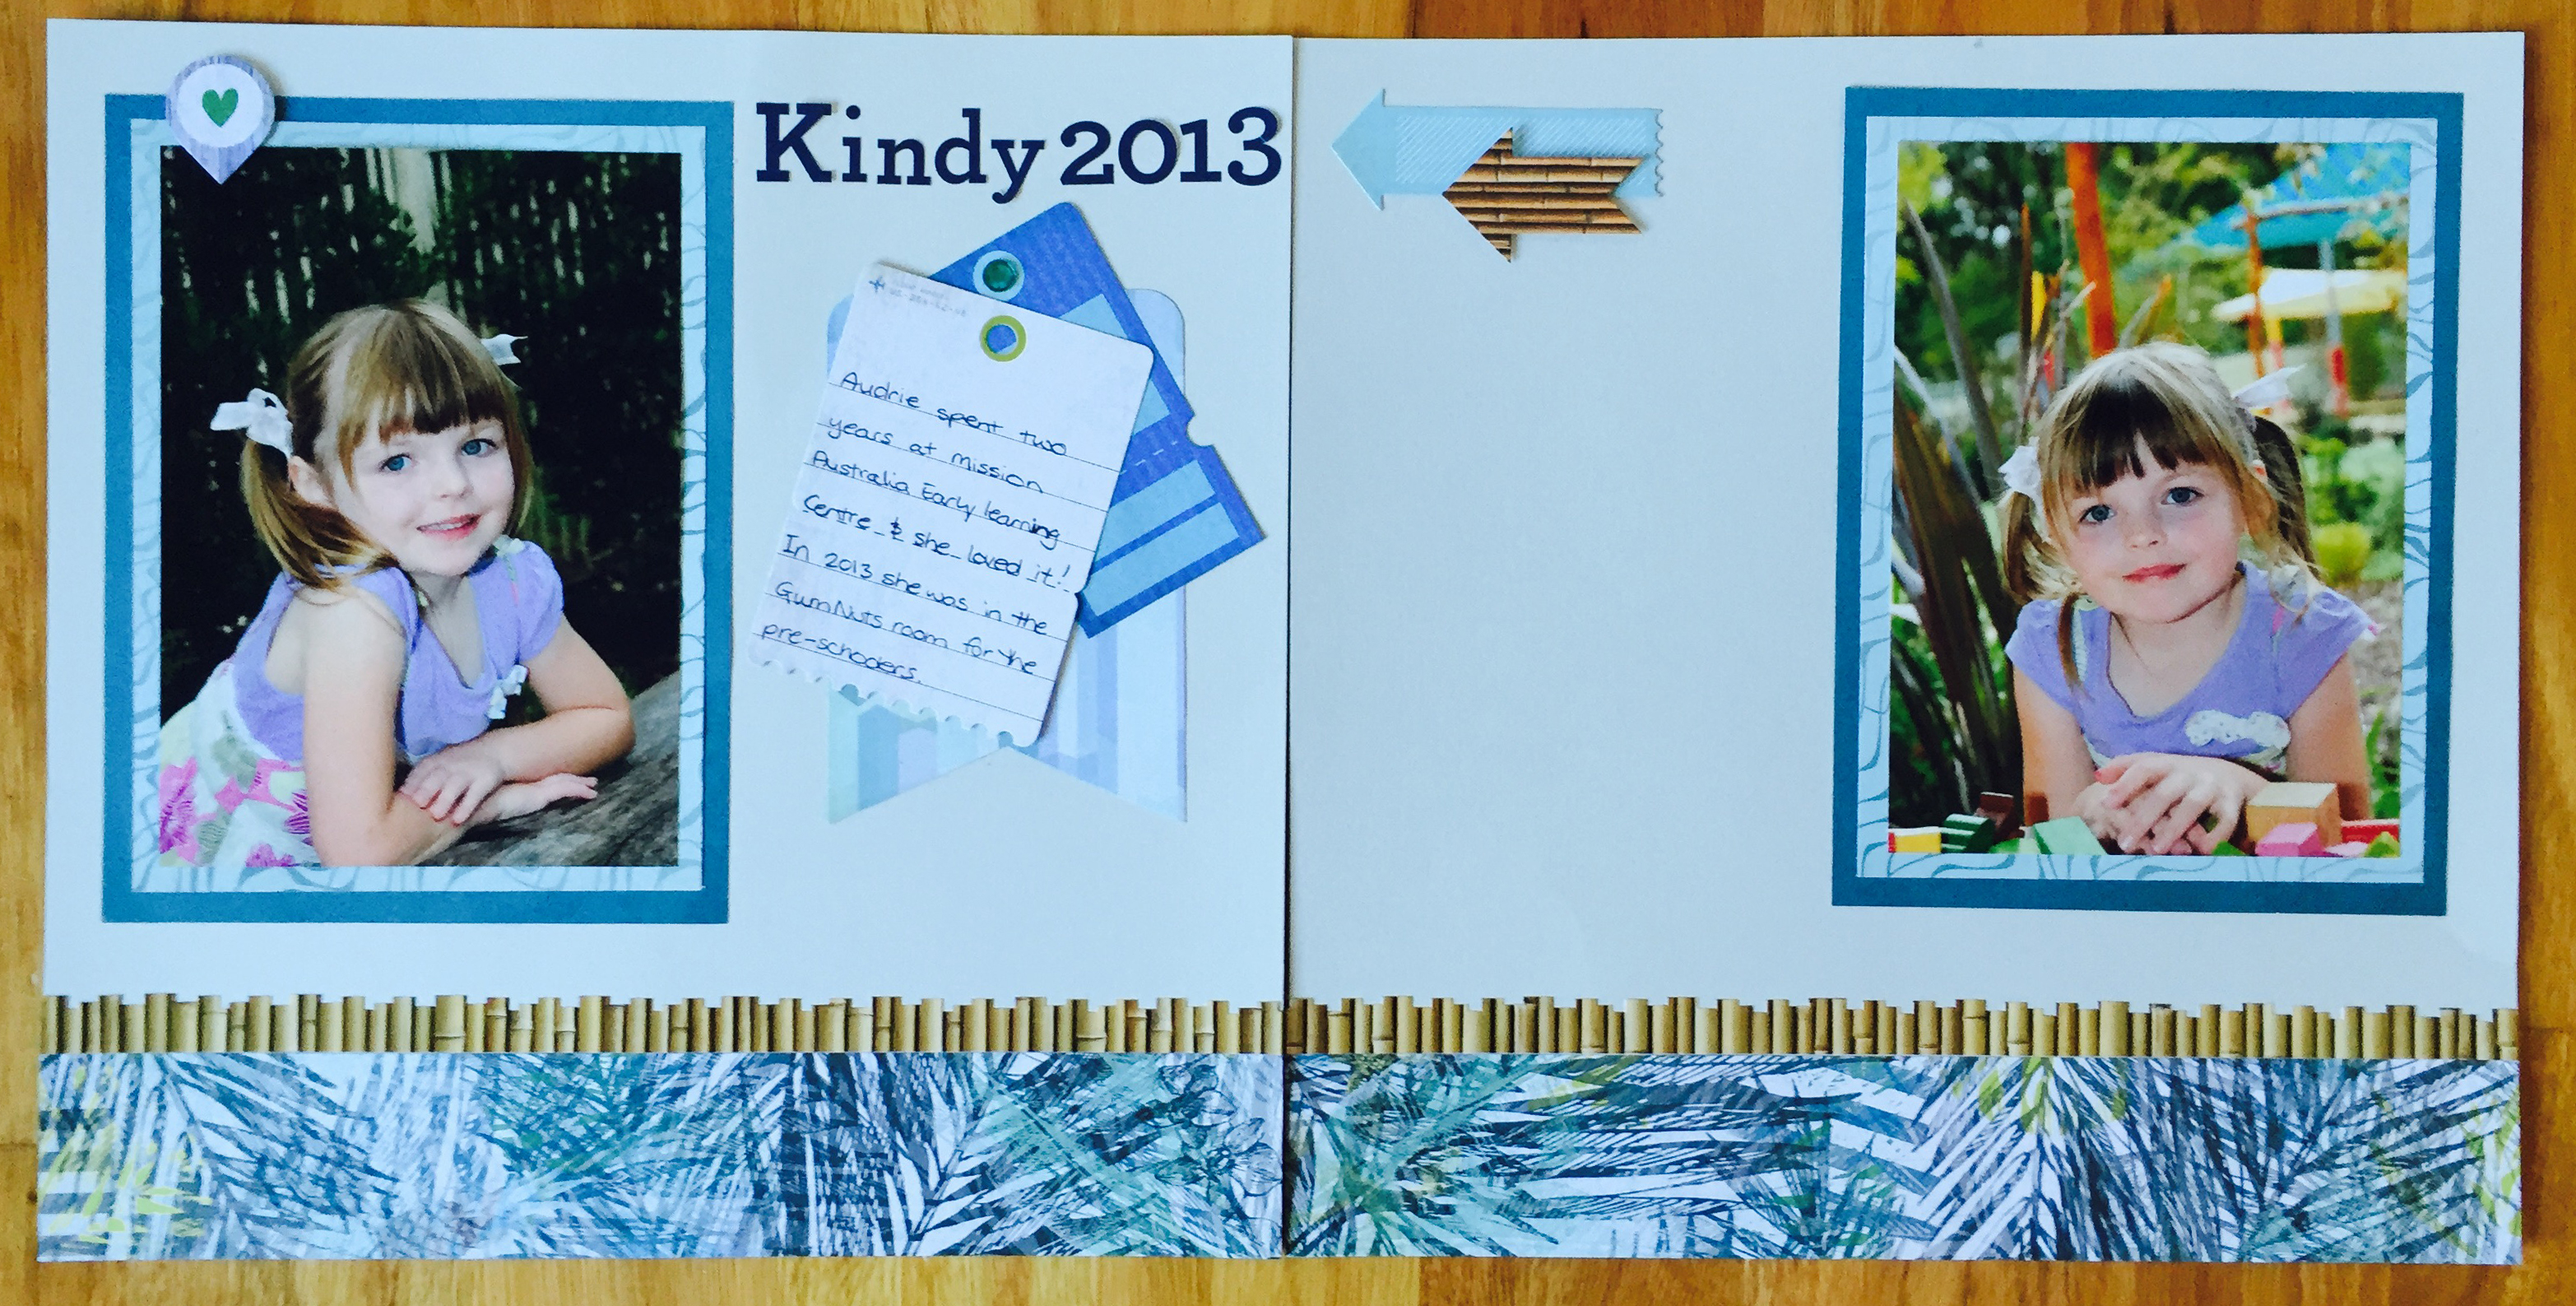
Created by Kelly Batten – AUS:
Step 1: Cut 1 sheet of pattern paper from Cool Serenity paper pack according to sketch directions. Adhere to grey cardstock from the 12 x 12 Travel Solid Cardstock Pack as shown, flipping the large photo mats over to see the back side of the paper.
Step 2: Trim 2 rectangles of additional pattern paper Cool Serenity paper pack at 5-1/2″ x 7-1/2″ position as a double mat for the photos.
Step 3: Trim the bamboo sticker strip from Cool Serenity Stickers in half longwaysas shown.
Step 4: Add title using Navy ABC/123 Stickers. Trim a rectangle of pattern paper from Cool Serenity paper pack, round the corners and use scissors to trim a v-shape at the bottom. Adhere this under the title on the left page as shown. Layer 2 tag embellishments on top and journal on the tag embellishment.
Step 5: Embellish pages with Cool Serenity Embellishments.
Created by Tiffany Chittenden-AUS:
Ingredients: 1 sheet Be Bold & Flourish Designer Paper, 1 sheet Dark Grey Cardstock (Travel Pack), 1 sheet Black Cardstock, 1 Be Bold & Flourish Slide-In.
Tools: Trimmer, Tape Runner, Foam Squares, Border Maker System with Flower Chain Cartridge, Black Dual-Tip Pen.
1. Cut Designer Paper as shown in sketch instructions. After cutting the 4 pieces, trim the 8″x6″ piece for the right page down to 8″x4″.
2. Cut the Grey Cardstock into three 12″ pieces – one 8″ wide and two 1/2″ wide.
3. Cut the Black Cardstock 8 1/4″ x 6 1/4″ (large photo mat), 6 1/4″ x 4 1/4″ (small photo mat) and 4 1/4″ x 2″ (adjust this small mat to suit your title).
4. Punch out a Flower Chain from remaining Black Cardstock and then cut it in half along the centre of the flowers.
5. Trim your Title out of your chosen Slide-In (example is 4″ x 2″).
6. Assemble as shown, sliding the 1/2″ x 12″ Grey strips under until only 1/4″ is showing.
7. Use Foam Squares to mount the title. Journal as desired.

Created by Krislyn Mattei-US:
Using Bubble cartridge, punch a border out of teal/candy stripe Soiree paper. Trim to 2″x12″. Repeat.
Using Ocean Wave cartridge, punch the other side of bubble border (use sticky notes to secure to guide). Repeat.
Cut remaining piece of teal/candy stripe paper in half to make 2 6″x8″ rectangles.
Using Bubble cartridge, punch a border out of navy Soiree paper. Trim to 2.5″x12″. Repeat.
Using Ocean Wave cartridge, punch the other side of bubble border. Repeat.
Arrange pieces as shown for a 2-page layout.
Add Soiree flags on top, Uncharted sailboat and Cool Serenity tag.
Add photos and journal!
So—You have TWO hours! Go, and create a spread using this sketch! :) It doesn’t have to be EXACT, just use it as inspiration! Please use hashtag #cmjulyvirtualcrop !!!
Happy Creating!
Melissa

Oooo, the bunting idea would work great to make rosette ribbons!
[…] July Virtual Crop: Challenge 1 […]
love all the ideas